Showing posts with label vegan. Show all posts

Thursday, October 15, 2009

Baby, it's Cold Outside! Citrusy Roasted Beets


According to the weather reporters around here, we're having one of the coldest Octobers on record.

The lovely people at the The Old Farmer's Almanac who are, incidentally, known for their amazingly accurate weather prediction skills, are telling us to expect a colder-than-average winter this year.

And I'm the only person I know who is genuinely gleeful about this- I adore harsh winters, snow shoveling and all!

I'm sure this is due, in part, to all the body-and-soul-warming cooking that can happen only when the kitchen isn't 102'F and/or dripping with the nasty, oppressive humidity that Boston likes to dump on everyone each spring and summer.

Naturally, something I really love coming back to each fall is roasting. We roast everything around here- meat and vegetables, obviously, and often fruit, too. It's such a beautifully easy technique, and best of all, roasting (in this case) gives you foolproof caramelization, which catapults humble vegetables like cauliflower, broccoli, parsnips, celery root and beets from dry and fibrous to sweet and succulent.

I can't think of a better way to discover that you like beets!

When in season, blood orange juice lends a lovely tart zip. These are particularly good added to winter salads.


Citrusy Roasted Beets
serves 4 as a side dish

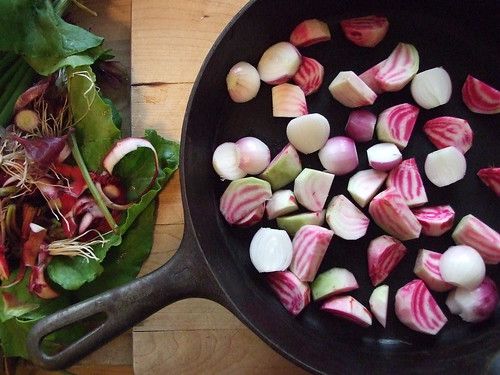
1 pound beets, trimmed, peeled and quartered*
3 tablespoons orange juice
2 tablespoons olive oil
1 teaspoon orange zest
pinch of sea salt

Preheat oven to 425'F.

Line a baking sheet with parchment paper or a Silpat baking mat OR use a cast iron skillet large enough to hold the beets in a single layer.

Stir together orange juice and orange zest. Set aside.

Toss beets in olive oil and tip onto baking sheet/into skillet. Sprinkle with salt.

Roast, tossing occasionally, until the beets are soft when pierced with a fork, usually around 30-45 minutes depending on the size of your beets.

When done but still piping hot, toss roasted beets with orange juice + zest mixture.

Serve warm or at room temperature.

* There is some debate as to whether beets should be peeled before or after roasting. I like to peel and cut them up first because this way, you get great caramelization on the cut sides of the beets.

Saturday, January 12, 2008

Blood Orange Sorbet


Now that the Christmas and New Year holiday celebrations are over and life is a bit less hectic, I've had time to try out the gorgeous ice cream maker that L gave me for Christmas! I've coveted one for a quite a while, and am absolutely thrilled with this one. For a machine with such a simple mechanism it works beautifully, and we've had great success with it so far. L certainly knows that fun kitchen gadgets are the way to my heart!

As citrus season is upon us and there are so many tasty fruits just waiting to be eaten, I've been experimenting entirely with fruit sorbets. The very first thing I made was a positively addictive, intensely refreshing Italian Lemon Ice (post on that coming soon) from The Gourmet Cookbook that, for some reason, doesn't seem to be in their online recipe database. I was worried that it would be too sweet, but during our many taste tests I realised that I should have a bit more faith in Gourmet's recipes- the Lemon Ice was tart and sweet, with a fabulous icy mouth-feel and lovely hint of bitterness from the zest. We immediately made three more batches to share with family and friends at holiday dinners.

Aside from blueberries, I think blood oranges have got to be my favourite fruits, so naturally, I've been itching to make a blood orange sorbet. If you have an electric juicer and/or microplane zesting rasp, now is the time to use both. The lovely thing about sorbet is that when you base your recipes on flavours combinations you love, you really can't go terribly wrong when experimenting. Happily, we were thrilled with my first pass at blood orange sorbet- the texture is very smooth, and the intense blood orange flavour comes right through, with just the right balance of honeyed sweetness and bright citrus tang. I love the vibrant rosy colour, too!

So many sorbet recipes call for water to make the simple syrup, but I like a more intense flavour and colour, so I prefer to use only juice. I also adore the flavour of honey paired with fruits, so for citrus sorbets, I try to use honey in place of granulated sugar whenever possible. According to David Lebovitz (The Perfect Scoop), honey gives frozen desserts a smoother texture, too, due to the higher concentration of sugars.

If you made New Years resolutions to get healthier, exercise more, or at least try to eat better, then this is the perfect dessert for you. If you didn't bother with those kinds of resolutions, you can eat even more sorbet in one sitting!


Blood Orange Sorbet

3 cups (24 ounces/710 ml) freshly squeezed blood orange juice
3/4 cup (6 ounces/177 ml) cup good honey or 1 cup (8 ounces/227 g) white granulated sugar
2 tablespoons (28 grams) finely grated blood orange zest
2 tablespoons blood orange pulp (optional)
pinch of salt

Make a simple syrup by warming 1 cup of blood orange juice with honey or sugar over low heat, stirring frequently, until the honey or sugar has completely dissolved.

Remove from heat and stir in zest and salt. Stir in blood orange pulp, if using.

Pour simple syrup into a bowl with the remaining 2 cups blood orange juice and stir to combine.

Chill mixture thoroughly, then freeze according to your ice cream maker instructions. Initially, the sorbet will seem fairly soft, but it will firm up considerably in the freezer.

If you don't have an ice cream maker, don't worry- you can turn this into a granita! Pour the chilled mixture into a shallow pan and freeze, stirring with a fork every 30 minutes, until slushy- about 2 hours.

Friday, November 30, 2007

Basic Tomato Sauce


Making tomato sauce from scratch is almost as easy as boiling water, and we think it tastes better than anything you can buy in a jar. It's surprisingly economical, too.

Hot cocoa aside (made with Chocolate Malt Ovaltine, which I still love), this tomato sauce was the first thing I cooked entirely on my own from start to finish. I was 7 years old, or thereabouts, when I discovered the recipe in The Classic Italian Cookbook by Marcella Hazan, and my wonderfully patient, indulgent mom ate many, "I want to cook tonight!" pasta-and-sauce suppers once I learned to make it reasonably well.

I must point out here that I absolutely, positively love Marcella Hazan. When I was a child, she made me feel completely at ease in the kitchen; as an adult, I've learned to rely on her for recipes which actually work (if you've had seemingly manageable recipes fail miserably, you'll know how comforting this is) and taste fabulous each and every time.

I still make this sauce, though L has mostly taken over the process, and we've made a few small changes along the way. To make things easier, and because the quality of fresh tomatoes can vary wildly, we take Marcella's advice and rely on San Marzano canned tomatoes, which are reliably consistent in taste and texture.

If you're making the sauce for pasta, toss pasta and sauce in a warm bowl as soon as the pasta is done. If you're making this sauce for pizza, spread a thin layer over the dough and top as you like. Of course, you can also use this in any recipe that calls for tomato sauce. For a change of pace, stir in a few tablespoons of chopped basil leaves for a bright, fresh taste that's fabulous on pizza, or add 1/4 cup heavy cream for a decadent sauce that is especially good over stuffed pasta. Add these additional ingredients as soon as you take the finished sauce off the heat.

Once you've tried it, it will come as no surprise that this has always been one of my very favourite recipes.


Basic Tomato Sauce
Adapted from The Classic Italian Cookbook by Marcella Hazan

1 28-ounce can of crushed tomatoes
2 medium yellow onions, sliced or chopped as you wish*
2 tablespoons unsalted butter or extra virgin olive oil
Kosher salt to taste (this will depend on the saltiness of your tomatoes)
Pinch of sugar**

Pour tomatoes, onions, and sugar into a nonreactive pot. Bring the mixture to a simmer, then cover the pot and continue to simmer, stirring occasionally to prevent burning, until the onions are soft (usually 40-45 minutes).

Uncover the sauce and stir in the butter or olive oil. Taste and correct for salt, then simmer uncovered for another 10 minutes. Use as you wish.

* If you want to keep the onions in the sauce, finely dice or roughly chop them. If you prefer to discard them (per the original recipe), cut the whole onions into halves, simmer them in the sauce, and remove when the sauce is done.

** Thank you, Lesha!

Thursday, October 25, 2007

Crispy Oven-roasted Potatoes


"What I say is that, if a fellow really likes potatoes, he must be a pretty decent sort of fellow."
A. A. Milne (1882-1956)

Everyone has a few odd food preferences, myself included. My mom introduced me to the joys of bread with chocolate, something that usually gets me funny looks in the States, though I don't know anyone who would turn down a buttery chocolate croissant. We always keep plain yogurt in the 'fridge, so that I can snack on yogurt swirled with a dollop or two of preserves... or grape jelly. This revelation always gets me a skeptical expression, but really, both are fabulous combinations!

I also love potatoes in every possible form (I wonder if this is my Slavic heritage coming through), which means that I absolutely and completely adore- and yes, I freely admit this- tater tots. I've been known to keep a five-pound bag of them at all times in the freezer. They have to be super crispy, though, so I bake them a bit longer than directed. Fellow potato lovers understand this, but it's another thing that, without fail, draws funny looks from people who might not share my adoration for the Solanum tuberosum. L used to make fun of me for this, but then he actually tried a tater tot, and lately he's been known to sneak a few off my plate.

The potato has a fascinating history. The Incas cultivated them for sustenance and medicinal purposes, which included placing slices of potato on injuries such as broken bones to assist the healing process. Until much later, Europeans considered potatoes poisonous to humans and suitable only for hog feed, when instead, like many other members of the Solanaceae/Nightshade family, it's the the leaves and stems that are deadly. The sly, ingenious antics of Antoine-Augustin Parmentier successfully introduced the potato to the French, and eventually ensured that not all of France starved to death during multiple country-wide famines. On the other hand, his fellow Frenchmen Jean Anthelme Brillat-Savarin and Denis Diderot both wrote that the potato had only one purpose- as a safeguard against famine in desperate times.

In any case, tater tots aren't exactly something that I serve to company, so I also rely on an easy, satisfying recipe that my mom makes often: crispy roasted potatoes. I've read recipes that have you parboil the potatoes or go through some other extra, fiddly step(s), but I don't find that any of those things are necessary. Just make sure that potato quarters are similarly-sized and keep an eye on them during cooking to prevent burning, and you will end up with a fabulous combination of tender potato and crispy outer crust.

These are particularly lovely as part of a brunch spread, as well as with saucy meat dishes like braises and stews... or if you're like me, you don't need a reason to make them!


Crispy Oven-roasted Potatoes
serves 4-6 as a side dish

If you are lucky enough to have a few tablespoons of duck or goose fat, gently warm until it melts into a liquid, substitute that for the olive oil, and these will turn out even better.

3 pounds small potatoes, cut into quarters
3 tablespoons olive oil
3 tablespoons minced fresh herb of your choosing (rosemary, thyme, oregano, tarragon)
1-2 teaspoons kosher or sea salt

Preheat oven to 425'F. Line a baking sheet with parchment paper or a Silpat baking mat.

Toss potatoes with olive oil and tip onto baking sheet. Sprinkle with minced herb and salt. Bake, tossing occasionally, until exteriors are crispy and interiors are soft when pierced with a fork, about 45 minutes.

Taste and correct for salt while piping hot. Serve immediately.

Thursday, October 4, 2007

Apples + Spiced Plum Applesauce


As part of our yearly CSA membership, we purchase a fruit share that comes directly from a local partner farm. This amounts to a 1/2 peck of fruit every week- mostly apples, sometimes plums, peaches and pears, and occasionally a bunch or two of concord grapes.

Apples are unfailingly abundant in the fruit share, and we can always count on seeing a different mix of cultivars each week. Some are familiar, others are entirely unknown, and it's fun to sample the strikingly different flavours and textures.

Our favourite is the Macoun apple, a good eating and cooking apple, and a cross between the Arkansas black and McIntosh cultivars. Macouns are usually small and flushed vivid pink or red, with icy-white, sweet-tart juicy flesh. Sadly, they only comes into season for a few short weeks somewhere between September and November, which for us means a flurry of apple dishes and at least 2 apples eaten out-of-hand each day until, in a flash, they're out of season until next autumn.

This week, we brought home a bag of Macouns, Cox's Orange Pippins and Gala apples. We ate as many as we could, and I turned the rest into my favourite breakfast, dessert and snack: applesauce!


You can make this applesauce with one type or a mixed variety of apples, and you can leave small strips of peel on the apples if you like an extra bit of texture. If you use a food mill to process the finished applesauce, you can skip the peeling step altogether- when you run the applesauce through the mill, any of the smaller plates will force the flesh through, leaving most of the skins behind.

If you want applesauce straight up, omit the plums; if you want something a bit different, substitute 1 pint of berries for the plums. I love this mixed with an equal amount of roasted, mashed butternut squash or pumpkin.

Spiced Plum Applesauce
Makes about 6 cups

3 pounds apples, peeled, cored and cut into large chunks
1 pint damson plums, pitted
2 cups water
1/3 cup light brown sugar, plus more to taste
juice of 1 lemon
1-inch piece of fresh ginger, peeled (optional)
1 cinnamon stick
1 star anise pod
1 cardamom pod
dash of nutmeg

Put all ingredients except the lemon juice into a nonreactive* saucepan. Turn burner to low heat and cook at a steady simmer, covered and stirring occasionally. When the apples are soft- after about 45 minutes- turn off the heat and stir in the lemon juice.

Remove from heat and allow to cool. When the applesauce has cooled to room temperature, remove the ginger, cinnamon stick, star anise and cardamom pod. Taste and correct for sugar.

At this point, you have multiple mashing options:

Use a potato masher or fork for a chunky texture
Use a food mill fitted with the largest-holed disc for a medium texture
Use a food mill fitted with a small-holed disc for a fine texture
Use a food processor for a fine texture- go easy and pulse sparingly here
Divide the applesauce and use more than one method for a mix of textures

*nonreactive = enamel or stainless steel; not aluminum or cast-iron

Wednesday, September 26, 2007

Gourmet Weekly + Slow-roasted Tomatoes


I'm a sucker for cooking magazines, but I'm not usually a fan of e-newsletters. I love the convenience of the internet, but in the whirlwind of our technology-savvy (and perhaps somewhat addicted?) culture, there is something soothing about settling on the couch with a blanket, mug of tea, a bright, glossy magazine in your lap, and a quiet hour to read.

In my mind, however, there is one exception to the monotony of most e-newsletters. Gourmet Weekly provides just enough information to get you thinking (and learning) about fun new gadgets and ingredients, in addition to showcasing seasonal recipes you might otherwise have missed. And best of all, it's free!


Last week they provided links to a few fabulous tomato recipes, including Provencal Oven-roasted Tomato Sauce and Slow-roasted Tomatoes. I've already raved about the tomato sauce; this week, we discovered the salty-sweet, intense, sunny flavour of the oven-dried, slow-roasted tomatoes. They're positively addictive, and I'm amazed that we didn't eat them all the moment they were cool enough to handle!

For the most part, I'm not a huge fan of sun-dried tomatoes, but these are very different, and oh-so-much better. I used the small, sweet Orange Banana plum and the tiny yellow pear tomatoes from the farm, and I made a few batches with garlic and a few without.

One batch had the misfortune of turning into tomato-scented charcoal; I learned quickly that not all tomatoes will need the full 8 hours in the oven. I recommend starting with 4 hours and adding one-hour increments- tasting as you go- as you need them.

A few epicurious reviewers have had success freezing them, so I packed the chewy, moist slices between layers of waxed paper, sealed up the packets with sheets of freeze-tite, and into the freezer they went! I have a feeling that this will be a great way to transform the unremarkable hothouse tomatoes you find in most New England grocery stores during the winter.

Our friend A has gotten everyone hooked on the combination of sun dried tomatoes and smoked gouda, and I think these will be a perfect stand-in for the tomatoes at a winter celebration- New Years Eve, perhaps?

Thursday, September 20, 2007

Miso Dressing


During my senior year of college, I was introduced to the joys of homemade miso soup by a Japanese roommate. She would add a cup of just-boiled water or dashi to a heaping tablespoon of moist, soft miso, and voila! you have a fast, tasty soup. If you've got either on hand, a bit of cubed tofu and small slices of kombu are nice additions. Either way, it tastes just like the miso soup you'd get at a Japanese restaurant.

While I love simple oil-and-vinegar salad dressings, most bottled dressings are too sweet for me. When I discovered this dressing and played with the recipe a bit, I hit upon the perfect balance of flavours, and L and I were hooked. The salty acidity is a perfect foil for salad vegetables, which are often sweet enough on their own.

We keep a container of miso and a jar of this dressing in our fridge at all times. Dinner guests seem to love it, and it encourages impromptu snacking on salads (rather than my beloved potatoes, which apparently aren't nearly as healthy as other vegetables). We've found that it goes particularly well with tomatoes and roughly grated carrots.


Miso Dressing

1 heaping tablespoon red miso (akamiso) or white miso (shiromiso)
1-2 cloves garlic, peeled
1 one-inch piece of fresh ginger, peeled
pinch of sugar
2/3 cup rice vinegar
2/3 cup safflower oil (or any other neutral oil)

Put the miso, garlic, ginger and sugar into a food processor. Pulse a few times, until the garlic and ginger are finely chopped. Add the rice vinegar all at once and pulse until you have a well-mixed slurry. Turn on the processor and, with the processor running, add the safflower oil in a slow, steady stream until you have a thick emulsion.

If you don't have a food processor, you can mince the garlic, grate the ginger, and mix both with the miso and sugar in a medium-sized bowl. Add the rice vinegar and whisk to combine. Whisking like mad, add the safflower oil in a slow, steady stream until you have a thick emulsion.

Miso dressing can be stored in the refrigerator for at least a week.

Sunday, September 16, 2007

Provençal Oven-roasted Tomato Sauce


Daylight hours are getting shorter, temperatures are dropping, and summer-green trees are now speckled with the first copper and scarlet leaves of fall. Autumn is fast approaching, but the tomato plants at the farm are still producing like mad. Every week we take home heavy bags of them- seven pounds one week, nine pounds the next, and always a mixture of hefty, meaty sauce tomatoes and tiny, intensely-flavoured cherry and pear varieties.


I love tomatoes raw in just about anything, but I've also been looking for ways to store some of summer's bounty for the dark winter months ahead.

As usual, Gourmet came to the rescue with a freezer-friendly recipe for
Provencal oven-roasted tomato sauce. I used a combination of red and yellow tomatoes (and one tiny green-striped tomato) and roasted them, with dried herbs from our porch garden, on parchment paper, for exactly 35 minutes total (how often do recipes work out that precisely?!). I wanted to strain out the tomato skins and seeds, so I didn't skip the food mill processing.

Usually, making homemade tomato sauce requires equipment-hogging and time-consuming processes: blanching, peeling, seeding, and chopping the fresh tomatoes. This method is fabulously, infinitely easier.

Roasting gives the tomatoes and garlic an unusually intense, yet mellow flavour; herbs and orange juice add a lively brightness. When we tasted the first batch, I was worried that we'd eat the whole jar before it went into the freezer. This is fabulous as a warm soup, and I can't wait to try it on homemade pizza and fresh ravioli!

Saturday, September 8, 2007

Frozen Pears + Freezer Preserving


In addition to all of the just-picked vegetables we brought home from Maine last weekend, we were given a large box of gorgeous crabapples, plums, and pears from the orchard.

Because the bounty from our CSA can sometimes be too much for two people to finish in a week (a double-edged sword), I've been learning to preserve produce. This is a very good thing, because there is no way we could finish all of this fruit while it's still ripe!

Canning is definitely fun. I love fruit preserved in any form, and there is a certain proud satisfaction to be had in the delicious results of a day spent with family or friends (or both, if you're lucky), settling on interesting recipes (I've got my eye on a particular Ginger Pear Jam), prepping and cooking, and packing finished preserves into sparkling-clean Mason jars. And if I'm being honest, I'll admit that I have a limited amount of energy for busy days spent over a hot stove and making a sticky, cluttered mess of the kitchen.


Luckily, the smart folks at the National Center for Home Food Preservation understand this dilemma. They have compiled an extensive set of instructions for freezing all kinds of foods, from avocados, loquats, oysters and pomegranates to applesauce and pumpkin puree.

In addition, Ball (the company that used to make those familiarly-shaped glass canning jars) has a new website where you can find a growing collection of recipes for freezer preserves, which don't require sterilized jars or a final boiling-water-canning or pressure-canning step. How easy is that?!

Not only is freezing easier and safer, but some studies suggest that the process of freezing produce destroys fewer vitamins and minerals than traditional hot-canning methods.

I've had limited experience freezing produce, so I'm hoping that it really does turn out to be a good alternative to canning. I'm certainly putting our half-sized, newly acquired upright freezer* (craigslist, how I love thee!) to good use! If the four pounds of pears frozen in syrup- my first experiment beyond freezing pesto- turn out well, I think a celebratory winter pear clafoutis will be in order.

* An extra special thank you L, S and A for retrieving it and carrying it up all those stairs!

Saturday, September 1, 2007

Breville Two-Speed Juice Fountain + Watermelon Juice


Ours is a juice-lovin' household. L talked about getting a juicer ever since our daily trips to the juice bars that dot the streets of Cairo, and I've always liked the idea of being able to make juice at home.

When L's birthday rolled around this year, I knew just what to get him. After doing a bit of research, I settled on the very well-reviewed Breville Two-Speed Juice Fountain (I'm not quite sure why they had to call it a juice "fountain"). We've tried lots of different combinations with great results, and I'm blown away by the amount of juice that this powerful machine can squeeze out of whatever we throw at it. Added bonus: most of the parts are dishwasher safe!

Not only do we get more fruits and vegetables into our diet (I sound like a doctor and a salesman, I know), but the juicer is a fabulous vehicle for using up desperately-need-to-be-eaten fruits and vegetables, too. We do our best, but I inevitably discover a few carrots or one lonely peach at the back of the refrigerator crisper. I hate throwing out food, so I'm happy that I have a way to use up whatever juice-friendly* produce we might have on hand.


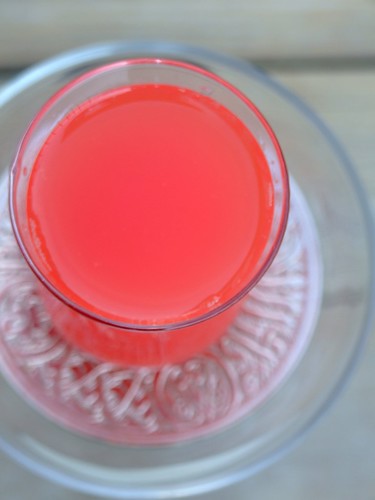
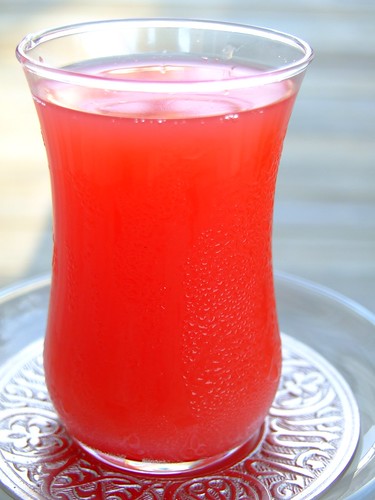
A few weeks ago, we bought a huge watermelon. I insisted, as I sometimes misguidedly do, that I was going to eat the whole thing before it went bad. After I'd gotten about 1/4 of the way through, I had to admit defeat. There was no way I was going to finish it on my own. Of course, there was only one thing to do! One weekend morning, I juiced one small lime with half of the watermelon flesh, seeds included, and it made enough to fill five lowball glasses with vibrant, coral-pink juice. A had spent the second half of the weekend with us, and the three of us agreed that the juice was fabulous.

If you're in the market for a juicer, I highly recommend Breville. If you already have a juicer, give watermelon juice a try. Next stop- watermelon cocktails!

* There are a few things, like spinach and garlic, that I just can't bring myself to juice. Blech.

Tuesday, August 28, 2007

Tomatillo and Husk Cherry Salsa


Over the past few weeks, we've been harvesting pints of tomatillos as part of our farm share. We had a fast-growing bowl of them sitting in our 'fridge, because I'm annoyingly picky and have been looking everywhere for the perfect tomatillo salsa recipe.

When S and A visit (they're with us for the week), we usually eat obscene amounts of salsa, especially when everyone gets peckish around mid-afternoon. I like tomato-based salsas, but I've been itching to try something different, and I really wanted to use up the tomatillos!

My first attempt at tomatillo salsa (two years ago)- an experiment without guidance from a recipe- failed miserably. The salsa was lip-puckeringly tart, with no real flavour other than an overwhelming sourness. Not wanting to waste these tomatillos on further wild experimentation, I decided to look to the experts. As luck would have it, the September issue of Gourmet magazine arrived just before we left for the camping weekend, and the back-page column (aptly called The Last Touch) happened to include a recipe for tomatillo salsa! What perfect timing!


We had two pounds of tomatillos and I dislike cilantro, so I doubled the recipe and substituted parsley. We also have a small bowl of husk cherries that desperately need to be eaten; as they're related to tomatillos, I figured it couldn't hurt to add a handful (about 15, peeled and coarsely chopped) about 10 minutes into the simmering process.

Happily, the salsa came out fantastic! The husk cherries add an intruiguing fruity note, the lime juice and parsley are refreshing additions, and the secret to muting the characteristic tomatillo tartness seems to lie in the brief simmering. This is a nice departure from our usual salsa choices.

Sunday, August 12, 2007

Basil Pesto


I have a long-standing love affair with pesto, and I'm sure that I am not alone. I first encountered the recipe- something a kid can easily make on her own- in my mother's copy of the Essentials of Classic Italian Cooking by Marcella Hazan. It's a great solution you're looking for something delicious and quick that requires very little heat-up-the-kitchen-cooking.

I've changed the quantities of the original recipe quite a bit, as I usually do (you may have noticed that habit!). I prefer a thicker paste with less oil to sink to the bottom of the bowl, a stronger cheese and garlic tang, and whole pine nuts for a bit of crunch. Marcella adds butter to hers, and while I like the flavour, I can happily do without (in my pesto, at least).

L and I eat a lot of pesto during the summer months, especially July and August, when basil is at its peak and you see piles of it at farm stands and grocery shops. When I'm making a batch for dinner, I often make an extra batch or two to freeze for later use. The bright, sunny flavour is a welcome respite during our long New England winters.


Basil Pesto

2 cups firmly packed basil leaves, rinsed in a bowl of water and gently dried
1/3 cup extra virgin olive oil
1/4 cup pine nuts for grinding
1/4 cup pine nuts to add whole
2 cloves garlic
1/2 teaspoon coarse kosher or sea salt, plus more to taste (use a little less if you use fine salt)

1/2 cup freshly grated parmegiano-reggiano cheese
4 tablespoons freshly grated romano cheese

Put the basil, olive oil, 1/4 cup pine nuts, garlic and salt into a food processor and pulse a few times until you have a paste dotted with small, recognizable pieces of basil, but not so long that you reduce the mixture to a fine paste. You can also use a mortar and pestle (grind to a paste), or by hand with a sharp knife or mezzaluna (finely mince).

If you're making a batch for the freezer, stir in the remaining 1/4 cup pine nuts and stop here. Fill a freezer-safe container with the pesto and toss into the freezer; add the cheeses later, when the pesto has thawed. Containers of frozen pesto can be thawed in the refrigerator or in a bowl of warm water.

If you are using a food processor or knife, stir in the cheeses and remaining pine nuts by hand. Do not be tempted to add the cheeses using the food processor- the resulting texture will not be the same. If you are using a mortar and pestle, add the cheeses and grind until well incorporated.

When you're ready to use the pesto, taste and correct for salt. Toss with hot pasta and serve immediately.

Thursday, July 26, 2007

Clothilde Dusoulier's Oven-Roasted Ratatouille


In June, I wrote about Pixar's delightful new summer movie: Ratatouille. I loved it, and I am happy to see that I am not the only one!

Of course, while leaving the movie theatre, I realized that I was going to crave ratatouille until I could get my hands on some zucchini. Lucky for me, Pixar timed the movie's release perfectly: midsummer marks the beginning of zucchini season in New England, and without fail, gardens and farmers' markets are flooded with the shiny, delicately flavoured fruits (yep- biologically speaking, they're both squash and fruit). The farm (as we call it) is fabulous when it comes to strategic planting, and last week the eggplant, zucchini and summer squash made their first appearances together at the weekly pickup tables. The lily-white summer onions are coming out in full force, so we took home a huge bunch of them as well.

I knew just what to do.


Last summer, after an uncomfortable evening spent making a very traditional version on a hot stovetop, I stumbled across an easy recipe that immediately became the only ratatouille recipe I will ever use: Clothilde Dusoulier's Ratatouille Confite au Four (Oven-Roasted Ratatouille).

I omit the green peppers, substitute a mix of regular and cherry tomatoes, double the onions, and add summer squash.


Just as Clothilde* says, roasting with a bit of salt gives everything a gorgeous savoury-sweet flavour, with a good texture and no trace of mushiness. And she's absolutely right- the flavour of this ratatouille improves the next day, and the day after that, which means it's a perfect make-ahead dish when you're having lunch or dinner guests. If you have an overabundance of zucchini, or even if you don't, I recommend trying her recipe. You just might find yourself eating it all summer long!

* I don't know her personally, but I feel a bit silly calling her "Ms. Dusoulier"! I hope she doesn't mind...

Monday, July 16, 2007

Roasted Summer Vegetables


golden beets

Until recently, I thought that I would never, ever like beets. There was something about their earthiness that was too much like actual dirt, and I don't mean the moist, luxurious, rich, fragrant black-earth type of dirt.

Then, we went to dinner at The Elephant Walk, a fabulous Cambodian and French restaurant in Cambridge.
I decided to give beets another try and ordered an extraordinary warm goat cheese and roasted beet salad. The salty tang of the goat cheese perfectly showcased the delicate, earthy sweetness of the tender beets, and it was the first time that I was able to really, truly enjoy them (happiness of the, "I'd definitely order these again!" variety). I started to think that I might secretly like beets after all! I'm always grateful when someone proves me wrong about these things.

Last week, we brought home bunches of tiny beets from the farm, and I wanted to recreate the flavours of that salad.
I know it seems absurd to roast anything at the height of summer, but it really does bring out the best flavours of these vegetables. And best of all, this is the time when beets, onions and carrots are tiny, tender and at their summer peaks. Try these on one of those rare cool summer nights when you can bear to turn on the oven.

Red beets stain anything and everything; unless you don't mind violet-stained hands and clothing, be sure to wear an apron.

These vegetables are particularly good alongside roast chicken or as part of an antipasto platter. I love them as finger food- no forks needed, and on top of toasted, goat-cheese-smeared baguette slices, if they last that long!


Roasted Summer Vegetables
serves 4 as a side course

6-8 small red beets, peeled* and quartered
6-8 small golden beets, peeled* and quartered
2 small yellow onions, peeled and quartered
2 small red onions, peeled and quartered
6-8 small carrots, peeled and cut in half widthwise
3 tablespoons extra virgin olive oil
1 tablespoon orange juice (optional)
1 teaspoon kosher salt, plus more to taste
3 sprigs fresh rosemary

Preheat oven to 400’F.

Toss the beets, onions, carrots, olive oil, 1 teaspoon kosher salt, and rosemary sprigs in a roasting pan until everything is evenly coated.

Roast for 35-45 minutes, tossing once or twice, until the vegetables are tender when pierced with a fork. Remove from the oven and toss with the orange juice, if you wish.

Taste and correct for salt. Serve hot or at room temperature.

*To peel the beets, use a sharp vegetable peeler. If you have rubber or latex gloves handy, wear those while you peel and slice. If you don't have gloves, you can hold the beet firmly, while you peel it, in the palm of your hand with a folded paper towel between your palm and the beet. Otherwise, just hang onto them barehanded and enjoy the gorgeous red stains on your fingers!

Friday, July 13, 2007

Chimichurri


Chimichurri is an Argentinian marinade and sauce that, traditionally speaking, accompanies grilled beef. I first tasted it at Tango, a fabulous Argentinian restaurant in Arlington. They have bottles of it on each table, and you are encouraged to pour it liberally on the vast array of beautifully grilled meats on their menu (if you go to Tango, try the flank steak- it's fabulously juicy and flavourful).

From what I've read, this will sound blasphemous to purists, but I'm going to say it anyway: chimichurri is good- really, really good- on just about anything!

We recently hot-smoked a pork loin for a dinner with friends, and I decided that chimichurri would be a fabulous complement to the smoky, tender meat. I naïvely thought it would be easy to find a good, straightforward recipe. It turns out that finding chimichurri recipes is easy... but deciding which one to use is not so simple!

As with many recipes, it seems, there are numerous debates as to what makes up the authentic version. Cilantro? Hot pepper? Tomatoes? Bell peppers? Carrots? The debates are numerous, and I quickly found myself lost in a sea of recipes. In the end, I decided that I should be more adventurous, and that I really didn't want carrots in my chimichurri.

I started with the basic common-thread ingredients: olive oil, vinegar, parsley, oregano, garlic and salt. Because L and I both love strong, spicy flavours, I added a few things I saw in the simplest versions: onion, lemon juice and spicy pepper. I pulsed everything briefly in the food processor, asked our friends to taste and review, adjusted a few things, pulsed again, and pretty soon ended up with a mixture that everyone liked. It turned out great the first day, but the leftovers were even better the second day.

Add this to your make-ahead list, or keep a jar of it in the fridge (if you're as addicted as we are), and you'll have one less thing to worry about at meal time.


Chimichurri
makes approximately 2 cups

1 large bunch flat leaf parsley
2 large or 4 small stalks oregano, leaves reserved and stems discarded
5-8 cloves garlic (start with 5)
1/2 of one medium red onion
2/3 cup extra virgin olive oil
2-3 tablespoons red wine vinegar (start with 2)
juice of 1 lemon, plus more to taste
1-2 teaspoons sea salt (start with 1), plus more to taste
1 small spicy pepper, stem removed (optional)

Put all ingredients in a food processor and pulse until you have a thick paste. If you don't have a food processor, mince the herbs, onion, garlic and spicy pepper as finely as you can, then stir in the liquid ingredients. Taste and correct for vinegar, lemon juice, garlic, and salt- you're aiming for a bold, savoury flavour here, but don't forget that chimichurri will intensify as it sits.

If possible, let the chimichurri sit for at least one hour before serving.

UPDATE: I recently experimented a bit and made this with:

lime juice instead of lemon
thyme instead of oregano
small, newly harvested summer onions instead of red onion

It was just as good! We also discovered that, like pesto, chimichurri freezes really well.

Friday, June 29, 2007

Kohlrabi, Tomato and Sugar Snap Pea Salad


We've been eating a lot of salads these days; this particular combination was an attempt to use up an odd assortment of vegetables before they lost their crunch. I'd never tasted kohlrabi before, but I knew that it can be eaten raw. Turns out that it tastes something like a cross between a cabbage heart and a radish, with a thick skin and crunchy, peppery flesh.

I was
pleasantly surprised by how well these vegetables work together! However, I do realize that you might not have all of these things on hand. Substitute whatever seasonal vegetables you might have, but don't omit the macerated onions and lemon juice, as they make up the dressing.


Kohlrabi, Tomato, Sugar Snap Pea Salad

serves 4 as a side course

1 large head red or green leaf lettuce, chopped with a very sharp knife
1 cup mizuna greens or arugula, chopped
1 medium kohlrabi, cut into short, thin slices
1/2 pint cherry tomatoes, quartered
1/2 cup sugar snap peas, halved
1/4 cup macerated red onions with liquid
juice of 1/2 large lemon
1 teaspoon sugar
1 teaspoon sea or kosher salt

Toss tomatoes with the sugar and salt in a bowl. Let this mixture sit at room temperature for 10-15 minutes.

Toss the rest of the vegetables together in a large salad bowl. Add the tomatoes and any juice that has accumulated in the bottom of the bowl. Add the lemon juice and toss well to coat.

Saturday, June 23, 2007

Summer's First Strawberries


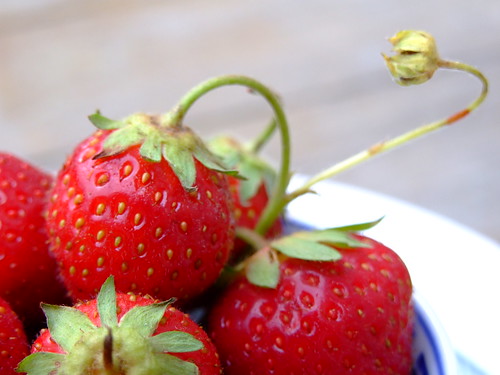
Strawberries- tiny, ruby-red, and bursting with flavour- have arrived! We took home our first few pints, straight from the pick-your-own farm and still warm from the sun. My relationship with berries of all kinds is fairly straightforward and absolutely gluttonous: give me a half hour alone with them, and I will eat every single one.

When it comes to the first summer strawberries, I don't do much in the way of heat-centric cooking. We eat them whole and unadorned when impatient, with plain yogurt and a drizzle of maple syrup (L) or honey (me) for dessert, and on top of sweet cream ice cream for special occasions.

If you want a classic technique, sprinkle sugar over sliced strawberries and allow them to sit- they will release juices to make their own sweet syrup. If you're looking for an unusual and refreshing treat, especially one that will surprise your dining mate or dinner guests, drizzle a small amount of good-quality (preferably aged) balsamic vinegar over whole or sliced berries.

Check your local newspaper or town/city/state website for information on pick-your-own farms near you. If you live in Massachusetts, I can give you a head start.

Wednesday, June 20, 2007

Macerated Red Onions


I found this recipe in one of my favourite cookbooks- Nigella Lawson's Forever Summer. We eat a lot of onions, both raw and cooked, so I was immediately drawn to this half-pickled, half-macerated alternative. I now keep a jar of these with the other condiments in our refrigerator.


When you macerate the onions in the oil-vinegar mix, they turn a vivid translucent cerise
and lose their sulfury-acrid bite. I've changed the oil and vinegar quantities a bit because I like a stronger acid kick, but the result is the same.

These are perfect in sandwiches and spooned over anything grilled. Add them with their liquid
to salads, perhaps with a splash of fresh lemon juice, and you'll have the only dressing you need.


Macerated Red Onions

1 medium red onion, halved widthwise and sliced as thin as possible
3/4 cup extra virgin olive oil
1/2 cup good quality red wine vinegar

Mix all ingredients in a shallow nonreactive (glass or ceramic) bowl and allow to sit for at least two hours before using. Onions can be kept covered, in an airtight container, in the refrigerator.