Friday, March 14, 2008

Ina Garten's Double Chocolate Pudding


It seems that March is turning into Sweets Month around here! If we have a sunny day that makes photographing a bit easier, I'll extend the streak with a last call before the citrus season ends: the previously promised recipe for Italian Lemon Ice.

The cold, snowy and rainy weather (it's too early for rain!) we've been having here lately has made it difficult to take anything but dark, shadowy pictures. It's unfortunate, too, because this weather is best weathered (ha!) from the warm and cozy indoors, preferably with a mug of tea and a new recipe to try.

In this spirit of new recipes, I recently whipped up a batch of Ina Garten's Double Chocolate Pudding. Unlike custards, which can be fussy and have the potential to go very, very wrong, this recipe is wonderfully simple. Don't get me wrong- I love the delicious elegance of custards and pots de créme- but sometimes all you want is a recipe that doesn't require too much mental energy and concentration. This dark, intense chocolate pudding fits the bill perfectly.

Since I knew that pure chocolate flavour would be showcased here, I used Scharffen Berger cocoa powder and, since Ina calls for semisweet chocolate, Scharffen Berger's 62% chocolate.

Percentages, which you are probably seeing listed on chocolate more and more these days, refer to the percentage of cacao-derived ingredients in chocolate. Chocolate with a higher percentage listed has a substantial amount of cacao and less sugar, so it is often labelled bittersweet, bitter or unsweetened. Chocolate with a low %- like milk chocolate- contains less cacao and more flavourings like sugar, milk and vanilla. White chocolate contains only sugar, cocoa butter, and milk solids.


Making this pudding was, not surprisingly, a breeze. Everything went swimmingly until the end, when it took a while for the pudding to thicken over low heat. I was convinced that I'd done something wrong or left something out, and I kept re-reading the recipe while trying to whisk at the same time... but once it started to firm up, the pudding turned beautifully, custardy-thick very quickly. Phew! I know that I can always trust Ina's recipes. Don't know what was going on in my head there.

The ease of this recipe means that you have absolutely no reason not to try it, unless you don't like chocolate, in which case there is no hope for you. The pudding has a pleasingly smooth texture, fabulously rich cocoa flavour and a lovely, lingering bitter chocolate finish. It's definitely not airy in a mousse sort of way, but there is an incredible lightness to it all the same.

I'd absolutely serve it to guests in elegant little bowls, and I imagine it would make a lovely cake or pastry filling, though I believe it's most delicious when eaten straight out of the bowl, preferably with help from friends.

Friday, March 7, 2008

Maple Berry Frozen Yogurt


Lately I've been really, really tired- hence my one and only February post. Pathetic, I know. I do love my day job, but during the busy months, it's absolutely exhausting. Between a big conference and related week-long work trip to New York City, fighting off the colds and flus that travelled mercilessly around my office and every other workplace in Boston, multiple snowstorms and seemingly endless show shoveling, and turning 27 (a crazy fun day that also required full energy for hours of walking, museum and cooking supply shop visits, and of course, eating), February was a tough month.

I know things are bad when I don't even have the energy to cook- the one activity that usually relaxes and energizes me! The good news is that we're already halfway through the semester, which means just a few more months of hectic madness before my job settles back into a more normal, fluid routine and I have more energy for kitchen experiments at home!

When I'm stressed, my appetite goes out the window, so I knew things were getting back to normal when I felt the urge to try out the ice cream maker again- this time, to make something other than sorbet. We didn't have nearly enough whole milk or cream in the house (why do these urges to experiment come right after we've gone to the grocery store?!) for ice cream or gelato, but we did have quite a bit of one of my favourite foods: yogurt. I have a lifelong love affair going with dairy products, and yogurt is at the very top of that list. So of course, frozen yogurt it was!

The inspiration for this frozen yogurt comes from a lovely, simple dessert that L's mom serves often during the summer: plain yogurt sweetened with a touch of maple syrup and topped with fresh berries. In both fresh and frozen versions, the clean tang of the yogurt is balanced by the bright, fresh flavours of the berries and the distinctive woodsy sweetness of the maple syrup. Salt sounds like a strange addition, but it really does bring out vibrant notes in sweets (see chocolates and caramels sprinkled with fleur de sel).

I used my favourite store-bought yogurt: Liberté 2%, and a frozen mixture of strawberries, blackberries, raspberries and blueberries. A gorgeous plummy purple flecked with vivid specks of juicy berries, easy-peasy recipe and healthier than ice cream- how can you go wrong?


Maple Berry Frozen Yogurt
makes approximately 5 cups

27 ounces/3 1/3 cups plain yogurt, thoroughly chilled
3/4 cups Grade A maple syrup, thoroughly chilled
10 ounces mixed berries, chilled if fresh or slightly thawed if frozen
pinch of salt

2+ quart capacity bowl, chilled in the refrigerator

Coarsely mash by hand the cold berries and any juice they give off, or roughly purée with just a few pulses in a food processor.

Quickly mix cold yogurt, maple syrup, berries and salt together in a cold bowl. Freeze according to your ice cream maker instructions (this batch took 30 minutes in my Cuisinart 2 quart ice cream maker).

Pack into containers and store in the freezer- the yogurt will harden considerably in the next 24 hours.

Sunday, March 2, 2008

Maslenitsa and Simple Blini


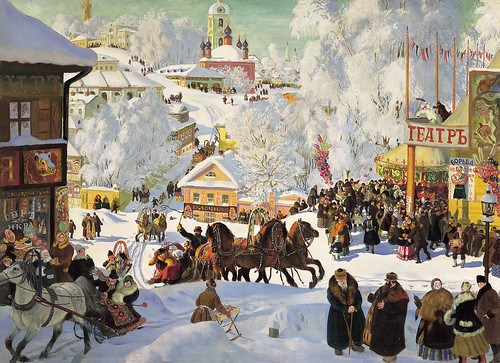
Ма́сленица, Maslenitsa, or "Butter Week," the Russian equivalent of Carnival or Shrovetide, is celebrated during the week leading up to orthodox Lent (March 2-8 this year). The holiday is full of merriment: Punch and Judy-style puppets shows, theatrical performances, troika sled rides, singing, bonfires, fireworks, a burning kostroma effigy to bid winter farewell and fertilize the coming crops... and nutty fun like icy-pole-climbing contests, naked "polar bear" dips in frozen rivers and lakes, and fistfights.

While I grew up celebrating Fat Tuesday, for some reason I've always preferred the blini and vodka-laden festival that is Maslenitsa.

Blini, an essential part of Maslenitsa, can be likened to Russian pancakes. They come in thin, delicate un-yeasted (like French crêpes) and thick, fluffy yeasted versions, and are always, always, always eaten in copious quantities with a variety of sweet and savoury fillings.

During his six-week high school homestay in Moscow, L was told by his host family that a real man will eat two forearm-length-tall stacks of blini, but that as an American, he would be allowed to get by on a one-forearm-length stack. Three years later, when I was a student in Moscow and L flew over from Egypt to visit, we were invited to an amazing, sumptuous dinner at the family's home, where true to her word, his former host mother cooked up the only appropriate amount for her family and the two of us: eye-high stacks of fabulously delicious blini.

A year later, my friend C and I were two of the four Russian majors in our class, and we lived in the same on-campus house that senior year of college. So naturally, we offered to host the Russian Department's yearly Maslenitsa festivities at our place. Early that morning, we rose and prepared the yeast blini batter, and I mixed up a huge batch of un-yeasted blini as well, for good measure. Early afternoon, when the guests started to arrive, arms piled high with bottles of vodka and homemade blini fillings, the fun officially began.

Out came both enormous bowls of batters. I showed our other housemates, who had happily joined in the merriment, and a few cooking-inclined Russian Studies students, how to pan-fry blini, and everyone took turns pouring batter, flipping the golden blini higher and higher, and sliding piping hot ones quickly onto plates ready for refills.

Over the course of a few hours, we made hundreds of blini for guests to pile high with the incredible array of homemade fillings: savoury sautéed wild mushrooms, ever-present and addictively-tasty marinated mushrooms, delicious баклажанная икра (bakhlazhanaya ikra, or eggplant caviar), salty home-smoked fish, thick sour cream, creamy fresh tvorog, glittering kompot, syrupy jams, sticky dark honey, rich local butter, and much more.

As bellies filled and blini consumption slowed, shots of icy-cold vodka flowed and "za druzhba! to friendship!" toasts carried through the house to the snow-covered front porch. As winter twilight descended and night fell, all around cheeks glowed pink from the blini-cooking stovetop warmth and free-flowing vodka. We celebrated for hours, and a faint, rosy morning light shone as the last guests departed, singing and laughing at the tops of their lungs.

Thankfully, most of our guests were students who lived on campus, and they left in pairs and groups to walk safely home; those who weren't students left with two designated drivers. No walking alone or driving for anyone that night!

I don't think I will be outdoing that celebration for at least a few more years! In the meantime, however, we will celebrate Maslenitsa with my favourite blini- a light, unyeasted recipe that turns out very thin pancakes with curled, crisp, lacy edges. There is some argument as to whether or not these can be called blini at all, as some people say that unyeasted pancakes are entirely different and must be called blintzes, but my Russian friends assure me that I can call them blini without reproach.

These blini are identical to many recipes for Czech palačinky- one of my childhood and current comfort foods- which is probably why I like them best. While it's not the traditional thick and fluffy version, this recipe is absolutely respectable for Maslenitsa celebrations.

This recipe lends itself well to doubling, tripling, and beyond. Don't worry if the first blin comes out looking awful, as this is just the way blini cooking works. The Russians even have a phrase for it: pervyni blin komom (the first blin is a flop)!


Simple Blini (or Palačinky)

1 cup all-purpose or whole wheat flour
1 1/3 cups milk (not skim)
1 egg
pinch of salt
1 teaspoon sugar (optional- only for sweet fillings)
Butter for pan

If possible, turn oven to very low heat and put a stack of plates inside to warm up. Alternately, you can use Alton Brown's method and warm the plates under an electrical heating pad. Cold plates will cool the blini very quickly, and they are best when piping hot.

In a large bowl, whisk together flour and salt to combine. In a separate bowl, beat the egg, then add milk (and sugar, if using) and whisk until well-mixed. Add egg and milk mixture to flour mixture and beat until smooth. You should have a fairly thin batter with few lumps.

Heat a heavy medium-sized griddle (a crêpe pan works well) on medium heat for two minutes. Add a pat of butter to the pan- if butter immediately smokes, pour off butter and turn the heat down. You want the butter to sizzle without burning.

Add 1/2 or 1/4 cup batter* to the pan and quickly swirl the pan at an angle so that the batter runs out in from the center all directions. Cook for 30 seconds and then start checking the underside- when it is golden brown, quickly flip the blin and cook for 15-30 seconds more, until golden spots appear on the pale underside and the blin moves freely on the pan.

Slide the blin onto a warm plate, top with a thin layer of filling(s), roll or fold up, and serve immediately.

* Makes 6 medium (1/2 cup batter) or 12 small (1/4 cup batter) blini.