Showing posts with label vegetarian. Show all posts

Thursday, October 15, 2009

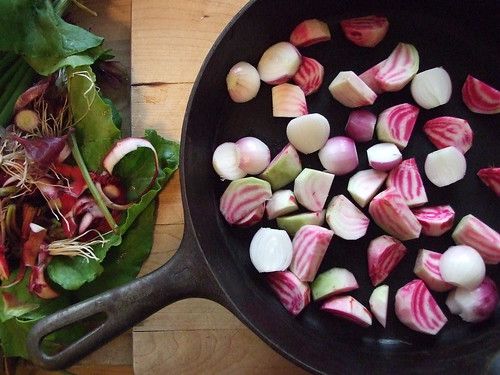
Baby, it's Cold Outside! Citrusy Roasted Beets


According to the weather reporters around here, we're having one of the coldest Octobers on record.

The lovely people at the The Old Farmer's Almanac who are, incidentally, known for their amazingly accurate weather prediction skills, are telling us to expect a colder-than-average winter this year.

And I'm the only person I know who is genuinely gleeful about this- I adore harsh winters, snow shoveling and all!

I'm sure this is due, in part, to all the body-and-soul-warming cooking that can happen only when the kitchen isn't 102'F and/or dripping with the nasty, oppressive humidity that Boston likes to dump on everyone each spring and summer.

Naturally, something I really love coming back to each fall is roasting. We roast everything around here- meat and vegetables, obviously, and often fruit, too. It's such a beautifully easy technique, and best of all, roasting (in this case) gives you foolproof caramelization, which catapults humble vegetables like cauliflower, broccoli, parsnips, celery root and beets from dry and fibrous to sweet and succulent.

I can't think of a better way to discover that you like beets!

When in season, blood orange juice lends a lovely tart zip. These are particularly good added to winter salads.


Citrusy Roasted Beets
serves 4 as a side dish

1 pound beets, trimmed, peeled and quartered*
3 tablespoons orange juice
2 tablespoons olive oil
1 teaspoon orange zest
pinch of sea salt

Preheat oven to 425'F.

Line a baking sheet with parchment paper or a Silpat baking mat OR use a cast iron skillet large enough to hold the beets in a single layer.

Stir together orange juice and orange zest. Set aside.

Toss beets in olive oil and tip onto baking sheet/into skillet. Sprinkle with salt.

Roast, tossing occasionally, until the beets are soft when pierced with a fork, usually around 30-45 minutes depending on the size of your beets.

When done but still piping hot, toss roasted beets with orange juice + zest mixture.

Serve warm or at room temperature.

* There is some debate as to whether beets should be peeled before or after roasting. I like to peel and cut them up first because this way, you get great caramelization on the cut sides of the beets.

Wednesday, September 9, 2009

Christmas Cookies 2009. Already.


Yes. I am already thinking obsessing about this year's Christmas cookies.

The problem is that I like to make lots of different ones, and I haven't found too many recipes that I really love (and that warrant the time, energy, and expense of making tin after tin of sweets).

I will absolutely make my favourite gingerbread recipe, because to me, it's not a truly proper Christmas without it. Same goes for the pecan fingers/puckle warts, though those are a much newer addition to our must-have Christmas cookie list. My mom, in particular, looooooooves them, which is reason enough to keep them on the list.

I'm pretty sure that I will make molasses crinkles again, as they're easy and always a big hit. Part of me wonders if they're too much like the gingerbread, but then again, they satisfy my craving for cookies speckled with chewy, spicy pieces of crystallized ginger in a way that the gingerbread doesn't.

I've also fooled around with mint chocolate cookies and bitter cream & orange biscuits. Both were great, they didn't meet the last-more-than-a-few-days and ships-well requirements.

I could always choose from the slew of gorgeous, delicious Czech Christmas cookies my family makes... but honestly? I get huge boxes from two households every year, and they've been making them for ages, so how can my baking compare? I'd like to make something different for us and to give to friends and family.

Since the cookie recipes passed down in family all fall into the Czech (and already being made by others) category, my first inclination is to search epicurious.com for their highest-rated offerings. Italian fig cookies? Grasshopper squares? Salty-sweet langues de chat? Pâtes de fruits (aka. have I lost my mind)?

It's enough to make me crazy (or maybe it's just me making myself crazy?!). Funny how as the colder weather moves in, visions of sugarplums swirl in my head as I try to fall asleep.

Saturday, February 7, 2009

The Minister's Red Currant Rum


In order to explain this recipe, I must admit something here: I love love love the Harry Potter
books.

Complete. Total. Sucker.

A few years ago, after I'd read the actual books, L gave me the audiobooks. When I am in the mood for a comfortable, familiar voice and story, when I want to zone out, or when I want to hear something calming as I fall asleep (audiobooks are great for shutting up a racing brain at bedtime), I put on one of those recordings. I think it must drive L nuts- or maybe it's so far past that now that he can just tune it out!

Pumpkin pasties and butter beer aside, every time I hear the Minister for Magic Cornelius Fudge order red currant rum, I've thought about how superbly delicious that sounds. Alas, as it so often is with things you crave (nevermind the fact that I'd never actually tasted it), I could not find a recipe for red currant rum anywhere. Not in cookbooks, not online, and not in the hands of fellow cooking-obsessed friends.

So in the end- poor poor me- here was a ready-made excuse to invent and test and try and taste and play around in the kitchen! As you can imagine, I was thrilled!

I originally wanted to drink this rum neat, and I do like a little sweetness in my straight-up-booze, so I made multiple batches of the red currant rum with a few different natural sweeteners. As usual, I preferred the particular flavour and sweetness of honey, perhaps because it reminds me of mead, and certainly because it's a perfect, earthy foil for the bright, tart currants.

If you don't like honey, I don’t know if I can be friends with you you can use sugar, keeping in mind that honey often tastes sweeter than sugar, so measure accordingly. I generally use a 3:4 ratio of honey to sugar. Drink sweetness is such a personal thing that I suggest you play around- start with a little and add in small increments- until you find a level that you like best. This rum ages well, so experimenting in this way is easy.

And before you go all, "why are you posting this now? currants aren't in season until late summer!" on me, just consider how much time you now have to plan!


The Minister's Red Currant Rum

1 cup fresh or frozen red currants
1 liter white rum
3 tablespoons honey (double or triple this if you want something more like a liqueur)

You will want to make your red currant rum in a glass (not plastic) container so that you can safely use a bain-marie, or water bath, to release those yummy currant flavours. I also believe that, in general, glass is a safer container for storing foods.

To prepare your bain-marie, heat a few liters of water in a saucepan large enough to accommodate your rum container.

If your currants are fresh and on the vine, pick them off. Wash the currants gently in cold water and let them drip dry in a colander or on a clean towel.

If your currants are frozen, just defrost them in the rum.

Drop the currants into your glass container (or pour them in, if you didn't insist on using a bottle with such a tiny mouth- argh), drizzle in the honey, and then add the rum.

At this point, carefully check your bain-marie. The water doesn't need to be boiling or just-boiled, but steam should be rising from the surface. If you're using Pyrex, you can keep the water at a simmer; if you're unsure about the quality of your glass, make sure the heat under the saucepan is turned off.

Put your rum container into the bain-marie and let it sit for 10 minutes. Then, remove the rum from the bain-marie and let it sit at room temperature until cool.

Seal/stopper/cover the rum and let it sit in a cool, dark place for at least six months and up to one year. Give the container a good shake every month or so. I like concentrated flavours, so I try to keep myself away from the rum for as long as I can!

When you're ready, strain the infused rum into a clean, sterilized container.

Enjoy your red currant rum neat, in your favourite cocktail recipe, or after aging, well-sealed, in a cool, dark place for up to a few years.

Thursday, April 17, 2008

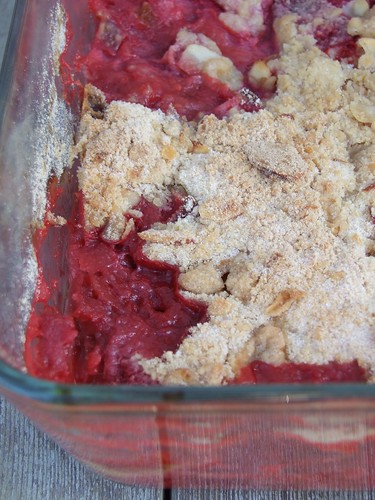
Strawberry Rhubarb Crumble


Ok. I know, I know. Rhubarb in April? That makes sense- it's just coming into season. But strawberries? In April? Not so much.

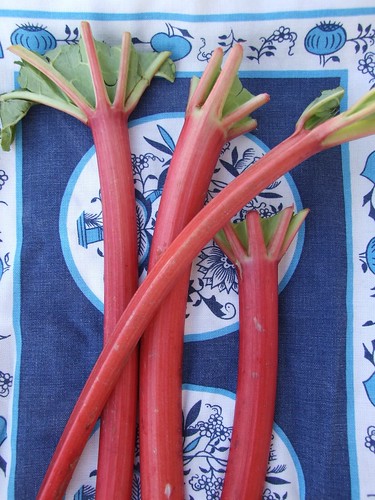
Here's the problem. Rhubarb is one of the first food plants to be ready to harvest in the Northeast, which means that rhubarb season has officially begun and the first young stalks- tender and flushed bright, coral pink- have finally appeared in my favourite grocery store.

Ok, that's not really the problem. The real issue is that, of course, the store had gorgeously bright stalks of rhubarb stacked strategically, temptingly close to pallets of strawberries. $8 for 8 pounds of berries is pretty damn cheap. But it's really not strawberry season here. Not even close- we have to wait for July for that. I don't think it's strawberry season on the West Coast either, so I am sure that these California strawberries were grown in a hothouse.

We were all set to resist them, thinking that we'd make do with just rhubarb. I was convinced that the strawberries would be, like so many hothouse grown fruits, all pretty looks with a bland, boring taste. But then, curiosity got the better of me and I leaned in to take a closer look at the ruby gems. That was when it hit me- the most fragrant summery scent I've enjoyed in months wafted up from the pallets.

Really, who can resist the idea of strawberry rhubarb crumble? Strawberry rhubarb sorbet? Strawberry rhubarb preserves? Strawberry rhubarb anything?

Not us. We came home with 8 pounds of tasty strawberries.

So, of course, the inaugural dish for the season's first rhubarb had to be a crumble. Perhaps we were blinded by the excitement of bright, summery flavours laced with a lovely refreshing note from the Cointreau- we happily devoured this plain, no ice cream needed... though I am sure a scoop or two wouldn't hurt!


Strawberry Rhubarb Crumble

For the filling:
2 quarts/16 ounces strawberries, washed and sliced into 1 inch pieces
8 ounces rhubarb, washed and sliced into 1/2-inch pieces
3/4 cup white sugar
1 teaspoon Cointreau (optional)

For the topping:
1 cups all-purpose flour
1/2 cup cold butter, cut into 1/2 inch dice
1/4 cup sliced almonds
3 tablespoons light brown sugar

Preheat oven to 400'F. Butter a 12 inch baking dish.

Toss rhubarb, strawberries, sugar and Cointreau (if using) in a bowl and set aside to macerate for 15-30 minutes.

To make the crumble topping, pour the flour and brown sugar into a small bowl. With quick movements and using the tips of your fingers, rub in the butter until it is thoroughly combined and has a texture like rough sand. Toss in the almonds.

Pour the fruit mixture into the buttered dish. Sprinkle the topping over the fruit.

Bake until topping is golden brown and fruit juices are bubbling, approximately 40-50 minutes. Serve warm.

Friday, March 14, 2008

Ina Garten's Double Chocolate Pudding


It seems that March is turning into Sweets Month around here! If we have a sunny day that makes photographing a bit easier, I'll extend the streak with a last call before the citrus season ends: the previously promised recipe for Italian Lemon Ice.

The cold, snowy and rainy weather (it's too early for rain!) we've been having here lately has made it difficult to take anything but dark, shadowy pictures. It's unfortunate, too, because this weather is best weathered (ha!) from the warm and cozy indoors, preferably with a mug of tea and a new recipe to try.

In this spirit of new recipes, I recently whipped up a batch of Ina Garten's Double Chocolate Pudding. Unlike custards, which can be fussy and have the potential to go very, very wrong, this recipe is wonderfully simple. Don't get me wrong- I love the delicious elegance of custards and pots de créme- but sometimes all you want is a recipe that doesn't require too much mental energy and concentration. This dark, intense chocolate pudding fits the bill perfectly.

Since I knew that pure chocolate flavour would be showcased here, I used Scharffen Berger cocoa powder and, since Ina calls for semisweet chocolate, Scharffen Berger's 62% chocolate.

Percentages, which you are probably seeing listed on chocolate more and more these days, refer to the percentage of cacao-derived ingredients in chocolate. Chocolate with a higher percentage listed has a substantial amount of cacao and less sugar, so it is often labelled bittersweet, bitter or unsweetened. Chocolate with a low %- like milk chocolate- contains less cacao and more flavourings like sugar, milk and vanilla. White chocolate contains only sugar, cocoa butter, and milk solids.


Making this pudding was, not surprisingly, a breeze. Everything went swimmingly until the end, when it took a while for the pudding to thicken over low heat. I was convinced that I'd done something wrong or left something out, and I kept re-reading the recipe while trying to whisk at the same time... but once it started to firm up, the pudding turned beautifully, custardy-thick very quickly. Phew! I know that I can always trust Ina's recipes. Don't know what was going on in my head there.

The ease of this recipe means that you have absolutely no reason not to try it, unless you don't like chocolate, in which case there is no hope for you. The pudding has a pleasingly smooth texture, fabulously rich cocoa flavour and a lovely, lingering bitter chocolate finish. It's definitely not airy in a mousse sort of way, but there is an incredible lightness to it all the same.

I'd absolutely serve it to guests in elegant little bowls, and I imagine it would make a lovely cake or pastry filling, though I believe it's most delicious when eaten straight out of the bowl, preferably with help from friends.

Friday, March 7, 2008

Maple Berry Frozen Yogurt


Lately I've been really, really tired- hence my one and only February post. Pathetic, I know. I do love my day job, but during the busy months, it's absolutely exhausting. Between a big conference and related week-long work trip to New York City, fighting off the colds and flus that travelled mercilessly around my office and every other workplace in Boston, multiple snowstorms and seemingly endless show shoveling, and turning 27 (a crazy fun day that also required full energy for hours of walking, museum and cooking supply shop visits, and of course, eating), February was a tough month.

I know things are bad when I don't even have the energy to cook- the one activity that usually relaxes and energizes me! The good news is that we're already halfway through the semester, which means just a few more months of hectic madness before my job settles back into a more normal, fluid routine and I have more energy for kitchen experiments at home!

When I'm stressed, my appetite goes out the window, so I knew things were getting back to normal when I felt the urge to try out the ice cream maker again- this time, to make something other than sorbet. We didn't have nearly enough whole milk or cream in the house (why do these urges to experiment come right after we've gone to the grocery store?!) for ice cream or gelato, but we did have quite a bit of one of my favourite foods: yogurt. I have a lifelong love affair going with dairy products, and yogurt is at the very top of that list. So of course, frozen yogurt it was!

The inspiration for this frozen yogurt comes from a lovely, simple dessert that L's mom serves often during the summer: plain yogurt sweetened with a touch of maple syrup and topped with fresh berries. In both fresh and frozen versions, the clean tang of the yogurt is balanced by the bright, fresh flavours of the berries and the distinctive woodsy sweetness of the maple syrup. Salt sounds like a strange addition, but it really does bring out vibrant notes in sweets (see chocolates and caramels sprinkled with fleur de sel).

I used my favourite store-bought yogurt: Liberté 2%, and a frozen mixture of strawberries, blackberries, raspberries and blueberries. A gorgeous plummy purple flecked with vivid specks of juicy berries, easy-peasy recipe and healthier than ice cream- how can you go wrong?


Maple Berry Frozen Yogurt
makes approximately 5 cups

27 ounces/3 1/3 cups plain yogurt, thoroughly chilled
3/4 cups Grade A maple syrup, thoroughly chilled
10 ounces mixed berries, chilled if fresh or slightly thawed if frozen
pinch of salt

2+ quart capacity bowl, chilled in the refrigerator

Coarsely mash by hand the cold berries and any juice they give off, or roughly purée with just a few pulses in a food processor.

Quickly mix cold yogurt, maple syrup, berries and salt together in a cold bowl. Freeze according to your ice cream maker instructions (this batch took 30 minutes in my Cuisinart 2 quart ice cream maker).

Pack into containers and store in the freezer- the yogurt will harden considerably in the next 24 hours.

Sunday, March 2, 2008

Maslenitsa and Simple Blini


Ма́сленица, Maslenitsa, or "Butter Week," the Russian equivalent of Carnival or Shrovetide, is celebrated during the week leading up to orthodox Lent (March 2-8 this year). The holiday is full of merriment: Punch and Judy-style puppets shows, theatrical performances, troika sled rides, singing, bonfires, fireworks, a burning kostroma effigy to bid winter farewell and fertilize the coming crops... and nutty fun like icy-pole-climbing contests, naked "polar bear" dips in frozen rivers and lakes, and fistfights.

While I grew up celebrating Fat Tuesday, for some reason I've always preferred the blini and vodka-laden festival that is Maslenitsa.

Blini, an essential part of Maslenitsa, can be likened to Russian pancakes. They come in thin, delicate un-yeasted (like French crêpes) and thick, fluffy yeasted versions, and are always, always, always eaten in copious quantities with a variety of sweet and savoury fillings.

During his six-week high school homestay in Moscow, L was told by his host family that a real man will eat two forearm-length-tall stacks of blini, but that as an American, he would be allowed to get by on a one-forearm-length stack. Three years later, when I was a student in Moscow and L flew over from Egypt to visit, we were invited to an amazing, sumptuous dinner at the family's home, where true to her word, his former host mother cooked up the only appropriate amount for her family and the two of us: eye-high stacks of fabulously delicious blini.

A year later, my friend C and I were two of the four Russian majors in our class, and we lived in the same on-campus house that senior year of college. So naturally, we offered to host the Russian Department's yearly Maslenitsa festivities at our place. Early that morning, we rose and prepared the yeast blini batter, and I mixed up a huge batch of un-yeasted blini as well, for good measure. Early afternoon, when the guests started to arrive, arms piled high with bottles of vodka and homemade blini fillings, the fun officially began.

Out came both enormous bowls of batters. I showed our other housemates, who had happily joined in the merriment, and a few cooking-inclined Russian Studies students, how to pan-fry blini, and everyone took turns pouring batter, flipping the golden blini higher and higher, and sliding piping hot ones quickly onto plates ready for refills.

Over the course of a few hours, we made hundreds of blini for guests to pile high with the incredible array of homemade fillings: savoury sautéed wild mushrooms, ever-present and addictively-tasty marinated mushrooms, delicious баклажанная икра (bakhlazhanaya ikra, or eggplant caviar), salty home-smoked fish, thick sour cream, creamy fresh tvorog, glittering kompot, syrupy jams, sticky dark honey, rich local butter, and much more.

As bellies filled and blini consumption slowed, shots of icy-cold vodka flowed and "za druzhba! to friendship!" toasts carried through the house to the snow-covered front porch. As winter twilight descended and night fell, all around cheeks glowed pink from the blini-cooking stovetop warmth and free-flowing vodka. We celebrated for hours, and a faint, rosy morning light shone as the last guests departed, singing and laughing at the tops of their lungs.

Thankfully, most of our guests were students who lived on campus, and they left in pairs and groups to walk safely home; those who weren't students left with two designated drivers. No walking alone or driving for anyone that night!

I don't think I will be outdoing that celebration for at least a few more years! In the meantime, however, we will celebrate Maslenitsa with my favourite blini- a light, unyeasted recipe that turns out very thin pancakes with curled, crisp, lacy edges. There is some argument as to whether or not these can be called blini at all, as some people say that unyeasted pancakes are entirely different and must be called blintzes, but my Russian friends assure me that I can call them blini without reproach.

These blini are identical to many recipes for Czech palačinky- one of my childhood and current comfort foods- which is probably why I like them best. While it's not the traditional thick and fluffy version, this recipe is absolutely respectable for Maslenitsa celebrations.

This recipe lends itself well to doubling, tripling, and beyond. Don't worry if the first blin comes out looking awful, as this is just the way blini cooking works. The Russians even have a phrase for it: pervyni blin komom (the first blin is a flop)!


Simple Blini (or Palačinky)

1 cup all-purpose or whole wheat flour
1 1/3 cups milk (not skim)
1 egg
pinch of salt
1 teaspoon sugar (optional- only for sweet fillings)
Butter for pan

If possible, turn oven to very low heat and put a stack of plates inside to warm up. Alternately, you can use Alton Brown's method and warm the plates under an electrical heating pad. Cold plates will cool the blini very quickly, and they are best when piping hot.

In a large bowl, whisk together flour and salt to combine. In a separate bowl, beat the egg, then add milk (and sugar, if using) and whisk until well-mixed. Add egg and milk mixture to flour mixture and beat until smooth. You should have a fairly thin batter with few lumps.

Heat a heavy medium-sized griddle (a crêpe pan works well) on medium heat for two minutes. Add a pat of butter to the pan- if butter immediately smokes, pour off butter and turn the heat down. You want the butter to sizzle without burning.

Add 1/2 or 1/4 cup batter* to the pan and quickly swirl the pan at an angle so that the batter runs out in from the center all directions. Cook for 30 seconds and then start checking the underside- when it is golden brown, quickly flip the blin and cook for 15-30 seconds more, until golden spots appear on the pale underside and the blin moves freely on the pan.

Slide the blin onto a warm plate, top with a thin layer of filling(s), roll or fold up, and serve immediately.

* Makes 6 medium (1/2 cup batter) or 12 small (1/4 cup batter) blini.

Saturday, January 26, 2008

Nigella's Orange Breakfast Muffins


It's funny what happens when the world outside is covered in towering, powdery-white snowdrifts and your home internet goes out for what seems like a Very Long Time: you are given the chance to really, truly focus on those things you love to do in your spare time, without obligations to e-mail, upcoming-birthday-gift-shopping, bill monitoring or anything else that can leave a person tied to the computer.

During the past week and a half, we had great fun celebrating A's birthday with friends, learned so much more about my camera (and just how bad food pictures can turn out in oh-so-faint indoor winter light), delighted in the sheer pleasure Argos takes in chasing snowballs and jumping into said snowdrifts, watched some of the movies on The List*, read parts here and there of five different books without finishing any of them, baked a ton, and hoped for another huge snowstorm so we can spend another lazy snow day at home with the puppers.

In addition to a double batch of lemon curd- requisite for all birthdays- we spent last weekend enjoying all sorts of yummy treats with friends. On Saturday morning, I spent a few minutes wondering what in the world we were going to have for breakfast- a behaviour very unlike me, since I am usually insanely OCD and plan these things ahead. Having just gone grocery shopping, we had plenty of ingredients for something fancy in the house, but I really wanted something really fast and easy- no time spent chilling in the fridge (à la yeast breads or bread puddings), minimal preheating, no thawing frozen farm fruit from the summer.


Happily, while furiously digging through a stack of cookbooks, I thumbed right to a recipe for Orange Breakfast Muffins that I've had dog-eared ever since my copy of Nigella Bites arrived in the mail last fall. Yes, I am absolutely addicted to Amazon's cookbook section- and honestly, who wouldn't be? They have everything- absolutely everything- one needs to keep a girl happy in the kitchen.

These orange muffins come in a very close second on the happiness scale: light and moist, with a lovely, distinct orange flavour (and color!), they immediately made it to my will-make-often recipe shortlist. I want to say that they remind me of bright, sunny summer mornings, but I realize that would be silly, given that citrus season is winter. Ach. In any case, you get my point- they are the perfect thing for cold winter mornings. I didn't have the energy to grind almonds, so I substituted an overflowing handful of paper-thin, crunchy sliced almonds, which added a nice texture and subtle almond flavour. The sweet citrus scent of the muffins in the oven is enough to make anyone hungry, so I highly recommend doubling this muffin recipe. On the off chance that they don't all disappear at breakfast, however, they keep beautifully for snacks and weekday breakfasts.

* You know- that list of movies that you really, really must see at some point. The list that grows twice as fast as the crossing-off part. That one.

Saturday, January 12, 2008

Blood Orange Sorbet


Now that the Christmas and New Year holiday celebrations are over and life is a bit less hectic, I've had time to try out the gorgeous ice cream maker that L gave me for Christmas! I've coveted one for a quite a while, and am absolutely thrilled with this one. For a machine with such a simple mechanism it works beautifully, and we've had great success with it so far. L certainly knows that fun kitchen gadgets are the way to my heart!

As citrus season is upon us and there are so many tasty fruits just waiting to be eaten, I've been experimenting entirely with fruit sorbets. The very first thing I made was a positively addictive, intensely refreshing Italian Lemon Ice (post on that coming soon) from The Gourmet Cookbook that, for some reason, doesn't seem to be in their online recipe database. I was worried that it would be too sweet, but during our many taste tests I realised that I should have a bit more faith in Gourmet's recipes- the Lemon Ice was tart and sweet, with a fabulous icy mouth-feel and lovely hint of bitterness from the zest. We immediately made three more batches to share with family and friends at holiday dinners.

Aside from blueberries, I think blood oranges have got to be my favourite fruits, so naturally, I've been itching to make a blood orange sorbet. If you have an electric juicer and/or microplane zesting rasp, now is the time to use both. The lovely thing about sorbet is that when you base your recipes on flavours combinations you love, you really can't go terribly wrong when experimenting. Happily, we were thrilled with my first pass at blood orange sorbet- the texture is very smooth, and the intense blood orange flavour comes right through, with just the right balance of honeyed sweetness and bright citrus tang. I love the vibrant rosy colour, too!

So many sorbet recipes call for water to make the simple syrup, but I like a more intense flavour and colour, so I prefer to use only juice. I also adore the flavour of honey paired with fruits, so for citrus sorbets, I try to use honey in place of granulated sugar whenever possible. According to David Lebovitz (The Perfect Scoop), honey gives frozen desserts a smoother texture, too, due to the higher concentration of sugars.

If you made New Years resolutions to get healthier, exercise more, or at least try to eat better, then this is the perfect dessert for you. If you didn't bother with those kinds of resolutions, you can eat even more sorbet in one sitting!


Blood Orange Sorbet

3 cups (24 ounces/710 ml) freshly squeezed blood orange juice
3/4 cup (6 ounces/177 ml) cup good honey or 1 cup (8 ounces/227 g) white granulated sugar
2 tablespoons (28 grams) finely grated blood orange zest
2 tablespoons blood orange pulp (optional)
pinch of salt

Make a simple syrup by warming 1 cup of blood orange juice with honey or sugar over low heat, stirring frequently, until the honey or sugar has completely dissolved.

Remove from heat and stir in zest and salt. Stir in blood orange pulp, if using.

Pour simple syrup into a bowl with the remaining 2 cups blood orange juice and stir to combine.

Chill mixture thoroughly, then freeze according to your ice cream maker instructions. Initially, the sorbet will seem fairly soft, but it will firm up considerably in the freezer.

If you don't have an ice cream maker, don't worry- you can turn this into a granita! Pour the chilled mixture into a shallow pan and freeze, stirring with a fork every 30 minutes, until slushy- about 2 hours.

Monday, January 7, 2008

Anijsblokjes / Dutch Anise Blocks


For as long as I can remember, my mom has kept at least a few long, thin tubes of Dutch anijsblokjes, or anise blocks- anise-flavoured sugar cubes used to make anijsmelk (anise milk)- in the spice cupboard. So of course, it follows that when I was a child, my mom and I often enjoyed anijsmelk in place of hot cocoa. Now that I live across the country, she sends a few tubes, which I hoard unabashedly, each year with my Christmas presents (thank you, mom!). I know that hot milk is something most people consider a children's drink, but I still love it, especially when transformed by a little something extra.

Not surprisingly, I love black licorice, pastis and ouzo, anise oil, and fennel in all forms; however, I will be the first to tell you that these sweet cubes are, strangely enough, very different. Drop one or two anijsblokjes into a mug of steaming hot milk and stir to help the wide, grainy cubes dissolve quickly. When you raise the cup to your lips, a sweet, subtle, almost floral scent swirls under your nose. Very delicately flavoured and not overbearingly sweet, anijsblokjes transform hot milk into a fragrant, soothing, perfect-for-cold-weather nightcap. Even L likes them, and he hates black licorice- and if that's not a selling point, then I don't know what is!

I've seen anijsblokjes in a few European grocery stores around the country, and a quick search turned them up in stores online as well. If you are lucky enough to spot them on a shelf near you*, be sure to give them a try. If you're feeling extremely generous, you are always welcome to send some my way, too!

* Unless you live in Holland, of course, in which case you can probably find them anywhere. I am supremely jealous.

Sunday, December 23, 2007

Baked French Toast


Due to a happy set of circumstances this year, we were lucky enough to spend many of our weekends with friends. When our lives get really busy, it's easy to forget how comforting and rejuvenating it is to share long, leisurely meals with good friends; I especially love breakfasts, with everyone in cozy pajamas and robes, rumpled hair (sometimes sticking out at all angles, or in my case, long and tangled), steaming mugs of coffee and tea warming cold hands, and a satisfying meal to start the day.

When we have house guests, I like to minimize the amount of energy-intensive breakfast cooking we do in the mornings by relying on dishes that can be assembled the night before: sweet bread puddings, savoury stratas, and conventional recipes that have been tweaked to make sleepy mornings just a bit less hectic. If you've got house guests this holiday season, it's a great time to fall back on something this simple for breakfast.


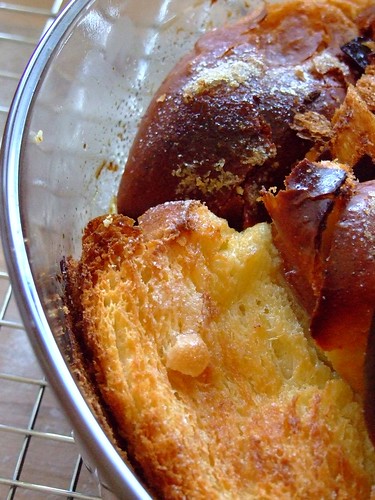
One dish that has been particularly successful in our house is a recipe for Baked French Toast that I found in The Gourmet Cookbook. We love to make it with challah or brioche, and since both types of bread come most often in large, thick loaves, I increase the amount of custard by at least 50% to ensure that there is enough liquid to moisten every slice of bread. I especially love it when a few edges get a bit toasted and caramelized!


Like its pan-cooked sibling, baked french toast is fabulous served with just about anything: maple syrup, fresh berries, sugar and lemon juice, Nutella, or any kind of jam (I highly recommend Damson Plum and Sweet Crabapple Preserves). A heaping platter of bacon served alongside never hurts, either.

Sunday, December 16, 2007

Christmas Cookies: New England Molasses Gingerbread Cookies


I absolutely despise molasses (no shoofly pie for me, thanks), but for some reason, when the strong molasses flavour is tempered by aromatic spices and the gentle heat of ginger, as it is in gingerbread, I'm in heaven.


I think this has quite a lot to do with my paternal grandmother. When I was a child, my Bohemian babička, or Czech grandmother, and her Czech friends would get together in their Chicago kitchens during the holiday season, and together they would bake and decorate amazingly delectable, incredibly gorgeous perniky, or Czech gingerbread cookies. The icing was always pure, snowy white, and if I was lucky, I'd find tiny silver nonpareils sprinkled strategically over the lines and swirls of icing.


At the end of November, the perniky would arrive at our house, carefully packed between layers of pristine white tissue paper, in a wide, flat, white pâtisserie pastry box beautifully tied up with twine. For some reason, my grandmother used only twine- never, ever scotch tape- when she wrapped gifts. I've never got the hang of that particular skill.

Once I knew the cookies had arrived, I'd beg and plead with my mother, but to no avail- I was allowed only one cookie each day leading up to Christmas Eve- the day Czechs celebrate Christmas. At the time, I thought it supremely unreasonable, but now that I've learned how much work really goes into decorated cookies, I understand her thinking. Treats this time-consuming to make should be savoured slowly and appreciatively, even by greedy five-year-olds!


For some stupid reason, I never thought to ask for the perniky recipe while my grandmother was alive- perhaps they do taste better when made with mysterious ingredients by a grandma- and I've been looking for a comparable recipe ever since she passed away. Even more frustrating is the fact that I have a book of her recipes that was discovered by my father and given to me last Christmas, but so far I haven't been able to find her gingerbread cookies amid the pages and pages of recipes written in her tiny, perfectly elegant script.


Luckily, while browsing online collections of Christmas cookie recipes in November, I came across
Bon Appétit's recipe for New England Molasses Gingerbread Cookies and saw that a few reviewers likened them to traditional German Pfeffernüsse and Lebkuchen. I knew at once that this recipe would be a good place to start.


The dough was soft and a bit tricky to work with, but it was also fairly forgiving and much easier to handle when I worked in small amounts, leaving the rest to chill in the 'fridge. I used regular (not robust or blackstrap) molasses, doubled the spices, and added a few good shakes (probably about a teaspoon each) of allspice and nutmeg to the mix. I also used Dorie Greenspan's Royal Icing recipe, which immediately became my new favourite- the icing was incredibly easy to pipe smoothly, stayed pliable in the pastry bag for at least a few hours, and hardened to a gorgeously snowy white, durable, faintly citrus finish with just the right amount of sweetness.


I used a few favourite cookie cutter shapes, including the traditional lucky Czech zlaté prasátko (golden Christmas pig) in two different sizes: medium-sized 2-3 inch and tiny 1-inch diameter. Decorating them took a long time, but once you get into a rhythm, everything goes quickly and smoothly (though I did have to take breaks to stretch out my arms and hands). Having a glass of wine on hand definitely helps, too.


The day I baked them, the gingerbread cookies were crisp and tasty, with a lovely blend of spices that intensified after the first bite. I was happy with them, but admitted to myself that something was missing- they weren't quite what I remembered. As most gingerbread needs a bit of time to improve, however, I hoped that these might as well, and I was not disappointed. A few days later, they had softened considerably to a more cake-like crumb, the spices noticeably more intense and complex- a flavour, when mingled with the sweet crunch of the icing, very, very much like my grandmother's perniky. I have rediscovered my childhood addiction, and in case you can't tell, these are the Christmas cookies of which I am most proud!


I've since found Czech gingerbread recipes online that include rum, coffee, honey, and ground spices like mace, star anise, aniseed, black pepper and coriander. I'm tempted to give other combinations a try, but am thrilled that I have a solid recipe to rely on each year! I suspect they'll never be quite as perfect as they are in my memories, but isn't that always the case?

Thursday, December 13, 2007

Christmas Cookies: Pecan Fingers


Christmas is that time of year when we, like so many other people, pull out all the stops when it comes to sweets. Into cookies and cakes go dark, rich Valrhona and Ghirardelli chocolate bars and cocoa powder, fragrant roasted nuts, shiny glaceed fruits, sticky sweet dates and dried figs, glittering candied citrus peel, spicy crystallized ginger, syrupy-thick molasses, local wildflower honey, Madagascar Bourbon vanilla, vibrantly yellow farm eggs (so tasty that we won't buy anything else), creamy, rich bars of European-style butter, butter and more butter...

In spite of my adoration for all these luscious ingredients, we don't often eat desserts at home, save the few times throughout the year when I get the urge to bake. I certainly can bake reasonably well (i.e. I can follow instructions of well-written recipes), but I have to be in a baking mood to really enjoy it.

Our friend Ida, on the other hand, is absolutely, positively, without a doubt a baking queen. She's an amazing, intuitive baker, and I am in love with her strawberry cheesecake (best made, it turns out, with a cocktail in hand) and carrot cake with cream cheese frosting. When we're lucky, she sends us home with sweets, but alas, it's always too dark to get decent pictures, and the yummy goodness is always gone in a flash anyway.


In any case, I do get the urge to bake like mad during the Christmas season. Spicy, citrusy, chocolaty- whatever the flavour, intense sweet aromas waft through the warm house. There is something so comforting about a warm kitchen full of tempting scents. Happily, I still have the energy for some intense cookie baking, so last night, I tested my fourth Christmas cookie recipe: Pecan Fingers or Puckle Warts.

When I was forming the pecan fingers, I couldn't help but notice that they looked more like shiny, pecan-studded baby... well, I won't say it. It's a bit gross, albeit somewhat amusing. I guess I'm not that good at forming cookies into appetizing log shapes. Is that even possible? Anyone?

With all that butter, too, I wondered how the cookies would hold up to being rolled between warm hands and baked in the oven for such a long time. Is one inch of space between the cookies really enough? Would they spread out too much? I'm glad to report that they came out exactly as described in the recipe, partially due, I am sure, to the long chilling time (I chilled them overnight out of necessity) and low, low baking heat.

The Pecan Fingers turned out to be absolutely, wonderfully addictive- oh my goodness, they are that good- with a light, shortbread-like buttery texture, fabulous honey undercurrent, nutty crunch that complements the crisp dough quite nicely, and a lingering sweetness from the double dustings of light, powdery confectioner's sugar. The dough is very easy to mix up, too- especially so if you have any kind of electric mixer.

The flame-coloured Le Creuset terrine mold my mom gave me a few years ago (I got lucky here- she was given two at her 1972 wedding to my father!), lined with a bit of waxed paper and clingfilm, is a perfectly-sized storage container for a few cookies short of one full batch- a convenient excuse for some taste testing, no?

I'm thrilled with another very successful recipe, and am very glad that, once again, Epicurious reviewers came through with reliable ratings and advice!

Monday, December 10, 2007

Christmas Cookies: Mint Chocolate Cookies


As you may have noticed, I often rely on recipes. Sometimes I tweak them until I feel like they've really become quite a bit more mine, if that makes sense, with grateful thanks to the person who provided the original recipe and a solid a jumping-off point. Other times, I end up adoring recipes as they are, perhaps with a few minor changes or additions, and I just want to tell everyone about this great! new! recipe! that I've found.

Not very original in the end, perhaps, but I'm finding that this blog has turned into a great way to share recipes with friends, as well as document my own experiments and newly discovered favourites for myself, too.

On that note, I discovered a few great Christmas cookie recipes this weekend. I printed out a pile of choices earlier in the week, and on Saturday morning L and I narrowed down the list to six recipes we wanted to try the most and headed out to buy extra whole wheat flour (it's always King Arthur flour in this house), molasses, confectioner's sugar and peppermint extract.


First, I made another batch of the Molasses Crinkles, since the first batch has been flying out of the cookie tin; then, I mixed up a batch of Mint Chocolate Cookies from the December 2000 volume of Bon Appétit.

The Mint Chocolate Cookies are soft and rich, and the light cocoa crumb and fabulous, clear peppermint note are reminiscent of Girl Scout cookie Thin Mints. I increased the peppermint extract to 3 teaspoons (1 tablespoon) and drizzled the cooled cookies with melted bittersweet chocolate, which took about 2 hours to cool and harden. They were a bit crumbly the day I baked them, but since then they have taken on a bit more brownie-like moisture. Some reviewers recommend cutting out 1/2 cup of the flour, and while the cookies are fabulous as is, I might give that a try with the next batch to see if they get even better!

Monday, December 3, 2007

Christmas Cookies: Molasses Crinkles


For as long as I can remember, I've had a close fondness for the Czech Christmas cookies I grew up eating from the beginning of December through New Years Eve and into January. I'm sure it's partially due to the fabulous cookies themselves, and part warm and fuzzy attachment to familiar, comforting traditions.

Every year at the end of November, heavy balls of both pale and dark doughs, wrapped tightly in waxed paper, pile up in the fridge; during weekends, the sweet smells of beautiful, delicious, and always tiny cookies and confections waft through the house.

There are always many different flavours and cookie types to savour, though the yearly lineup, specific to each family and passed down through generations of Czech women, generally remains the same in each household. Of course, I've always particularly loved the sweets that appear on my family's cookie platters: confections like crumbly, cocoa-brown Bear Paws dotted with crunchy walnuts, moist Almond Baskets brimming with sticky, nutty filling, sugary Beehives piped full of fluffy pastry cream, potent rum-spiked Chocolate Balls, thin Fig Salami slices peppered with dried figs and glaceed fruits, and my absolute favourites: Linecke Kolačky, which are very much like Linzer cookies, filled with a thin, sparkling layer of raspberry jam and glistening with a shiny, egg-washed surface.

To me, Christmas is not the same without those Czech cookies. But, in the interest of expanding my own repertoire, I am always looking for outstanding additions to the usual lineup. This year, I turned to one of my favourite sources: Epicurious. I am always drawn to the collections of cookie recipes that Gourmet and Bon Appétit magazines publish each winter, even though I know, in reality, that I will never find time to test all of the recipes I drool over each November.


I do, however, manage to narrow down my long, unmanageable dream list and try a few recipes, and last night I made my first test batch of Christmas cookies: Molasses Crinkles from the December 2004 volume of Gourmet. Because I, like my mom, absolutely love ginger in all forms, I took the advice of a few reviewers: I doubled the amount of ground ginger and added 1/2 cup of chopped crystallized ginger to the dough. I also baked the cookies for 9 minutes total- at 10 minutes, the cookies wavered between chewy and very crisp, depending on how soon I was able to get to the oven after the timer beeped.

Just as I'd hoped, these treats completely satisfy my ginger cookie cravings, and L and I were both really happy with how well the recipe turned out on the first try. I'll be surprised if this batch lasts more than a week! The cookies have a chewy center and crisp edges- the effect you typically get when you add butter and vegetable shortening to cookie dough- a great spiced ginger heat, and a delicious crackly sugar surface (L loves a crunchy sprinkling of sugar on baked goods, so I knew this aspect would really appeal to him). Molasses Crinkles are definitely going in my permanent Christmas recipe collection!

Friday, November 30, 2007

Basic Tomato Sauce


Making tomato sauce from scratch is almost as easy as boiling water, and we think it tastes better than anything you can buy in a jar. It's surprisingly economical, too.

Hot cocoa aside (made with Chocolate Malt Ovaltine, which I still love), this tomato sauce was the first thing I cooked entirely on my own from start to finish. I was 7 years old, or thereabouts, when I discovered the recipe in The Classic Italian Cookbook by Marcella Hazan, and my wonderfully patient, indulgent mom ate many, "I want to cook tonight!" pasta-and-sauce suppers once I learned to make it reasonably well.

I must point out here that I absolutely, positively love Marcella Hazan. When I was a child, she made me feel completely at ease in the kitchen; as an adult, I've learned to rely on her for recipes which actually work (if you've had seemingly manageable recipes fail miserably, you'll know how comforting this is) and taste fabulous each and every time.

I still make this sauce, though L has mostly taken over the process, and we've made a few small changes along the way. To make things easier, and because the quality of fresh tomatoes can vary wildly, we take Marcella's advice and rely on San Marzano canned tomatoes, which are reliably consistent in taste and texture.

If you're making the sauce for pasta, toss pasta and sauce in a warm bowl as soon as the pasta is done. If you're making this sauce for pizza, spread a thin layer over the dough and top as you like. Of course, you can also use this in any recipe that calls for tomato sauce. For a change of pace, stir in a few tablespoons of chopped basil leaves for a bright, fresh taste that's fabulous on pizza, or add 1/4 cup heavy cream for a decadent sauce that is especially good over stuffed pasta. Add these additional ingredients as soon as you take the finished sauce off the heat.

Once you've tried it, it will come as no surprise that this has always been one of my very favourite recipes.


Basic Tomato Sauce
Adapted from The Classic Italian Cookbook by Marcella Hazan

1 28-ounce can of crushed tomatoes
2 medium yellow onions, sliced or chopped as you wish*
2 tablespoons unsalted butter or extra virgin olive oil
Kosher salt to taste (this will depend on the saltiness of your tomatoes)
Pinch of sugar**

Pour tomatoes, onions, and sugar into a nonreactive pot. Bring the mixture to a simmer, then cover the pot and continue to simmer, stirring occasionally to prevent burning, until the onions are soft (usually 40-45 minutes).

Uncover the sauce and stir in the butter or olive oil. Taste and correct for salt, then simmer uncovered for another 10 minutes. Use as you wish.

* If you want to keep the onions in the sauce, finely dice or roughly chop them. If you prefer to discard them (per the original recipe), cut the whole onions into halves, simmer them in the sauce, and remove when the sauce is done.

** Thank you, Lesha!

Wednesday, November 21, 2007

Baked Brie with Caramelized Onions + Happy Thanksgiving!


Well, it seems that my plans for posting Thanksgiving recipes were soundly thwarted by this nasty cold, which seems to be lingering far longer than winter sickness usually does. It's going away veeerrry slowly and so far is keeping me from getting a good night's rest, which means that I'm having trouble thinking coherently about cooking and parties and holiday fun.

This week, my thoughts have been more along the lines of, "why can't I sleep... I really just want to sleep... must blow nose again... owch, nose is so raw... why can't we have nicer tissues at work... how many more mugs of tea and soup can I handle before I break down and go searching for some really good French fries... milkshakes are good for sore throats, right?... urg, brain hurts, must lie down..."

The good news is that we hard our first lovely, gently swirling snowfall of the season a few days ago, which lifted my spirits considerably, despite the fact that the snowflakes didn't actually stick to anything!


I can, however, manage to post one recipe that I love to make during the holidays: baked brie with caramelized onions. It's a perfectly balanced, velvety mix of warm, creamy brie and savoury-sweet, intensely flavoured onions. Without fail, it gets rave reviews; everyone always wants the recipe, and whenever we ask what to bring to the next party, the answer always seems to be, "the baked brie!"

We'll bring the baked brie to the feast at L's parents' house, along with some fabulous olives from Provence that may or may not be made into tapenade tomorrow morning. We usually try to bring more dishes to share, but since we're both sick and brain dead, I'm glad that we made it this far, and I'm especially thankful that we both have Friday off from work!

Clearly, I didn't create this recipe, though as always I tweak it a bit. I use a little less than one 750 ml bottle of white wine, adding it in 1/2 cup increments to deglaze every 10 minutes or so. I go through this cycle a few times, at least, while the onions get darker and more fragrant. I also cook the onions at medium heat for 45 minutes to an hour, until they are soft, salty-sweet, caramel-brown and and wonderfully sticky. In any case, you can't go wrong by following the recipe to the letter, either- this will still be one of the best appetizers you'll ever eat.

Next year, barring any similarly nasty colds, I'll have more recipes to post. This year, I wish everyone happiness, good food, long walks and warm company. Happy Thanksgiving!

Thursday, October 25, 2007

Crispy Oven-roasted Potatoes


"What I say is that, if a fellow really likes potatoes, he must be a pretty decent sort of fellow."
A. A. Milne (1882-1956)

Everyone has a few odd food preferences, myself included. My mom introduced me to the joys of bread with chocolate, something that usually gets me funny looks in the States, though I don't know anyone who would turn down a buttery chocolate croissant. We always keep plain yogurt in the 'fridge, so that I can snack on yogurt swirled with a dollop or two of preserves... or grape jelly. This revelation always gets me a skeptical expression, but really, both are fabulous combinations!

I also love potatoes in every possible form (I wonder if this is my Slavic heritage coming through), which means that I absolutely and completely adore- and yes, I freely admit this- tater tots. I've been known to keep a five-pound bag of them at all times in the freezer. They have to be super crispy, though, so I bake them a bit longer than directed. Fellow potato lovers understand this, but it's another thing that, without fail, draws funny looks from people who might not share my adoration for the Solanum tuberosum. L used to make fun of me for this, but then he actually tried a tater tot, and lately he's been known to sneak a few off my plate.

The potato has a fascinating history. The Incas cultivated them for sustenance and medicinal purposes, which included placing slices of potato on injuries such as broken bones to assist the healing process. Until much later, Europeans considered potatoes poisonous to humans and suitable only for hog feed, when instead, like many other members of the Solanaceae/Nightshade family, it's the the leaves and stems that are deadly. The sly, ingenious antics of Antoine-Augustin Parmentier successfully introduced the potato to the French, and eventually ensured that not all of France starved to death during multiple country-wide famines. On the other hand, his fellow Frenchmen Jean Anthelme Brillat-Savarin and Denis Diderot both wrote that the potato had only one purpose- as a safeguard against famine in desperate times.

In any case, tater tots aren't exactly something that I serve to company, so I also rely on an easy, satisfying recipe that my mom makes often: crispy roasted potatoes. I've read recipes that have you parboil the potatoes or go through some other extra, fiddly step(s), but I don't find that any of those things are necessary. Just make sure that potato quarters are similarly-sized and keep an eye on them during cooking to prevent burning, and you will end up with a fabulous combination of tender potato and crispy outer crust.

These are particularly lovely as part of a brunch spread, as well as with saucy meat dishes like braises and stews... or if you're like me, you don't need a reason to make them!


Crispy Oven-roasted Potatoes
serves 4-6 as a side dish

If you are lucky enough to have a few tablespoons of duck or goose fat, gently warm until it melts into a liquid, substitute that for the olive oil, and these will turn out even better.

3 pounds small potatoes, cut into quarters
3 tablespoons olive oil
3 tablespoons minced fresh herb of your choosing (rosemary, thyme, oregano, tarragon)
1-2 teaspoons kosher or sea salt

Preheat oven to 425'F. Line a baking sheet with parchment paper or a Silpat baking mat.

Toss potatoes with olive oil and tip onto baking sheet. Sprinkle with minced herb and salt. Bake, tossing occasionally, until exteriors are crispy and interiors are soft when pierced with a fork, about 45 minutes.

Taste and correct for salt while piping hot. Serve immediately.

Saturday, October 20, 2007

Lazy Weeknight Dinner


Though I love to spend lots of time cooking, our weeknight dinners are often very simple. Those days when we just can't agree on what to eat, or when we're too tired to cook anything at all, the idea of a treat is enough to garner energy for a quick trip to Russo's or Whole Foods, or on special days, Formaggio Kitchen.

The shopping list invariably includes a bottle or two of wine, a few loaves of crusty bread from Iggy's and Pain D'Avignon, a selection of interesting cheeses- some familiar, some new, perhaps some charcuterie, and a bar or two of good, dark chocolate.

When I was very young, my mom introduced me to the deliciousness of chocolate with bread, and it's always been one of my favorite treats; this particular dinner tradition wouldn't be the same without it.

A few glasses of wine, bread with cheese, and then chocolate with bread make up the perfect lazy weeknight dinner.


Pictured are two very unusual cheeses that we both recently enjoyed. I didn't particularly like the Brillat Savarin avec Moutarde (Brillat Savarin with Mustard) at first, but once I'd gotten the hang of balancing more of the subtle creamy cheese with less of the bold, grainy mustard coating, I found it luscious and addictive, with a pleasantly tangy, savoury kick.

I had the same experience with the the New York State Chèvre with Blueberry Compote: the flavours were a perfect complement, once I'd managed to balance the tangy, salty, crumbly cheese with the intense, sweet blueberry compote.

Tuesday, October 16, 2007

Banana Bread


Something about autumn makes me want to bake and bake, and then bake a bit more, as though we didn't have enough baked treats around already. During the hot summer months, it's hard to justify heating up the entire house for a loaf of bread or a cake that you're too hot to really want in the first place. During the fall, however, I adore the warmth radiating from the stovetop and the tantalizing baking aromas that waft through the house.

My post last week on spiced pumpkin bread got me thinking about, and of course craving, my mom's banana bread. I absolutely love it, but for some reason I've never gotten around to asking her for the recipe. We had a bunch of very, very ripe bananas on our counter for the past few days, which meant that there was only one thing to do! One weekend night at around midnight, when it was way too late to call and beg for the recipe, I realised that tweaking the pumpkin bread recipe might just do the trick.


Instead of pumpkin, I used four medium-sized, very ripe mashed bananas, along with 1/2 cup of roasted, mashed acorn squash that I found languishing in the 'fridge. This particular squash had such a subtle taste that I hoped it would add substance and texture without overpowering the banana flavour. I also omitted the heaping teaspoons of spices, opting instead for 1 teaspoon of allspice and 1 teaspoon of vanilla extract. And, as I usually do, I omitted the walnuts.

The bread came out golden and moist, with a pronounced, pleasant banana flavour. It tasted almost exactly like my mom's version. The recipe makes two large loaves, so once it had cooled, one loaf went right into the freezer. It will probably be eaten next week for weekday breakfasts.

Of course, there's nothing quite like a recipe that you grew up adoring, but I'm thrilled that this is pretty darn close!