Wednesday, September 26, 2007

Gourmet Weekly + Slow-roasted Tomatoes


I'm a sucker for cooking magazines, but I'm not usually a fan of e-newsletters. I love the convenience of the internet, but in the whirlwind of our technology-savvy (and perhaps somewhat addicted?) culture, there is something soothing about settling on the couch with a blanket, mug of tea, a bright, glossy magazine in your lap, and a quiet hour to read.

In my mind, however, there is one exception to the monotony of most e-newsletters. Gourmet Weekly provides just enough information to get you thinking (and learning) about fun new gadgets and ingredients, in addition to showcasing seasonal recipes you might otherwise have missed. And best of all, it's free!


Last week they provided links to a few fabulous tomato recipes, including Provencal Oven-roasted Tomato Sauce and Slow-roasted Tomatoes. I've already raved about the tomato sauce; this week, we discovered the salty-sweet, intense, sunny flavour of the oven-dried, slow-roasted tomatoes. They're positively addictive, and I'm amazed that we didn't eat them all the moment they were cool enough to handle!

For the most part, I'm not a huge fan of sun-dried tomatoes, but these are very different, and oh-so-much better. I used the small, sweet Orange Banana plum and the tiny yellow pear tomatoes from the farm, and I made a few batches with garlic and a few without.

One batch had the misfortune of turning into tomato-scented charcoal; I learned quickly that not all tomatoes will need the full 8 hours in the oven. I recommend starting with 4 hours and adding one-hour increments- tasting as you go- as you need them.

A few epicurious reviewers have had success freezing them, so I packed the chewy, moist slices between layers of waxed paper, sealed up the packets with sheets of freeze-tite, and into the freezer they went! I have a feeling that this will be a great way to transform the unremarkable hothouse tomatoes you find in most New England grocery stores during the winter.

Our friend A has gotten everyone hooked on the combination of sun dried tomatoes and smoked gouda, and I think these will be a perfect stand-in for the tomatoes at a winter celebration- New Years Eve, perhaps?

Sunday, September 23, 2007

Autumnal Equinox

No Spring nor Summer Beauty hath such grace
As I have seen in one Autumnal face.

- John Donne


Welcome fall!

Thursday, September 20, 2007

Miso Dressing


During my senior year of college, I was introduced to the joys of homemade miso soup by a Japanese roommate. She would add a cup of just-boiled water or dashi to a heaping tablespoon of moist, soft miso, and voila! you have a fast, tasty soup. If you've got either on hand, a bit of cubed tofu and small slices of kombu are nice additions. Either way, it tastes just like the miso soup you'd get at a Japanese restaurant.

While I love simple oil-and-vinegar salad dressings, most bottled dressings are too sweet for me. When I discovered this dressing and played with the recipe a bit, I hit upon the perfect balance of flavours, and L and I were hooked. The salty acidity is a perfect foil for salad vegetables, which are often sweet enough on their own.

We keep a container of miso and a jar of this dressing in our fridge at all times. Dinner guests seem to love it, and it encourages impromptu snacking on salads (rather than my beloved potatoes, which apparently aren't nearly as healthy as other vegetables). We've found that it goes particularly well with tomatoes and roughly grated carrots.


Miso Dressing

1 heaping tablespoon red miso (akamiso) or white miso (shiromiso)
1-2 cloves garlic, peeled
1 one-inch piece of fresh ginger, peeled
pinch of sugar
2/3 cup rice vinegar
2/3 cup safflower oil (or any other neutral oil)

Put the miso, garlic, ginger and sugar into a food processor. Pulse a few times, until the garlic and ginger are finely chopped. Add the rice vinegar all at once and pulse until you have a well-mixed slurry. Turn on the processor and, with the processor running, add the safflower oil in a slow, steady stream until you have a thick emulsion.

If you don't have a food processor, you can mince the garlic, grate the ginger, and mix both with the miso and sugar in a medium-sized bowl. Add the rice vinegar and whisk to combine. Whisking like mad, add the safflower oil in a slow, steady stream until you have a thick emulsion.

Miso dressing can be stored in the refrigerator for at least a week.

Sunday, September 16, 2007

Provençal Oven-roasted Tomato Sauce


Daylight hours are getting shorter, temperatures are dropping, and summer-green trees are now speckled with the first copper and scarlet leaves of fall. Autumn is fast approaching, but the tomato plants at the farm are still producing like mad. Every week we take home heavy bags of them- seven pounds one week, nine pounds the next, and always a mixture of hefty, meaty sauce tomatoes and tiny, intensely-flavoured cherry and pear varieties.


I love tomatoes raw in just about anything, but I've also been looking for ways to store some of summer's bounty for the dark winter months ahead.

As usual, Gourmet came to the rescue with a freezer-friendly recipe for
Provencal oven-roasted tomato sauce. I used a combination of red and yellow tomatoes (and one tiny green-striped tomato) and roasted them, with dried herbs from our porch garden, on parchment paper, for exactly 35 minutes total (how often do recipes work out that precisely?!). I wanted to strain out the tomato skins and seeds, so I didn't skip the food mill processing.

Usually, making homemade tomato sauce requires equipment-hogging and time-consuming processes: blanching, peeling, seeding, and chopping the fresh tomatoes. This method is fabulously, infinitely easier.

Roasting gives the tomatoes and garlic an unusually intense, yet mellow flavour; herbs and orange juice add a lively brightness. When we tasted the first batch, I was worried that we'd eat the whole jar before it went into the freezer. This is fabulous as a warm soup, and I can't wait to try it on homemade pizza and fresh ravioli!

Thursday, September 13, 2007

Damson Plum and Sweet Crabapple Preserves


Our big box of plums and crabapples from Maine presented the perfect opportunity to try something new. So,
as part of my current efforts to improve my preserving skills, I recently cooked up my very first jar of properly-canned preserves!

Before I started, I read through a slew of recipes and settled on a combination of the easiest basic techniques. I also made sure that at least one of my chosen fruits- the crabapples, in this case- has naturally high pectin levels, since pectin gives preserves their characteristic thick, gelled consistency.

This was my first solo attempt at this form of preserving, so
I was aiming for a small, manageable batch... and I was ready to change my expectations (sauce for ice cream, anyone?) if anything went wrong. Happily, the preserves turned out beautifully thick, with a nicely balanced sweet-tart flavour.

Since we ended up with a little over a pint, I've been able to try the extra ladlefuls a few different ways without opening our one sealed jar.

I'm saving this jar of preserves for the dead of winter, when we're craving something a bit different. A welcome change from our usual grape jelly (L) and sweet orange marmalade (me), this is fabulous spread on toast
or stirred into plain yogurt. I bet it would make a lovely layered cake filling, too.


Damson Plum and Sweet Crabapple Preserves

makes approximately 1 pint

1 1/2 pounds sweet crabapples*, cored and roughly chopped
1 pound damson plums, pitted
2 cups water
1 cup sugar
juice of 1 lemon (about 2 tablespoons)

Put the crabapples, plums and water into a heavy, nonreactive pot. Turn heat to low and simmer, uncovered and stirring often (check the bottom of the pot for sticking and/or burning), until the fruit is very soft and the mixture is thick and pulpy (approximately 2 hours).

Remove fruit mixture from heat and process, into a medium-sized bowl, with a food mill set with the smallest-holed plate. Process until you have a small amount of fairly dry solids remaining in the food mill (this should be mostly fruit peels). Discard these solids.

Put the fruit pulp back into the pot. Add lemon juice and sugar. Taste and correct for sugar, until preserves are as tart or sweet as you like.

Bring to a boil and let boil for 2 minutes. Pack into container(s), refrigerate, and consume within one week, or freeze and consume within one year.

If you wish to keep the preserves in your pantry, fill dry, sterilized jars (they should still be hot from the sterilization process) with the preserves and seal with sterilized caps. Process using a boiling water canner or pressure canner. Most guides say that properly canned preserves can be stored in a dark, cool place for up to a year.**

* You can use regular tart crabapples as well- just increase the sugar, to taste.

**NOTE: Canned foods can harbor toxic bacteria, mold and yeast. Please be sure that you follow safe canning practices (click here for a good start).

Saturday, September 8, 2007

Frozen Pears + Freezer Preserving


In addition to all of the just-picked vegetables we brought home from Maine last weekend, we were given a large box of gorgeous crabapples, plums, and pears from the orchard.

Because the bounty from our CSA can sometimes be too much for two people to finish in a week (a double-edged sword), I've been learning to preserve produce. This is a very good thing, because there is no way we could finish all of this fruit while it's still ripe!

Canning is definitely fun. I love fruit preserved in any form, and there is a certain proud satisfaction to be had in the delicious results of a day spent with family or friends (or both, if you're lucky), settling on interesting recipes (I've got my eye on a particular Ginger Pear Jam), prepping and cooking, and packing finished preserves into sparkling-clean Mason jars. And if I'm being honest, I'll admit that I have a limited amount of energy for busy days spent over a hot stove and making a sticky, cluttered mess of the kitchen.


Luckily, the smart folks at the National Center for Home Food Preservation understand this dilemma. They have compiled an extensive set of instructions for freezing all kinds of foods, from avocados, loquats, oysters and pomegranates to applesauce and pumpkin puree.

In addition, Ball (the company that used to make those familiarly-shaped glass canning jars) has a new website where you can find a growing collection of recipes for freezer preserves, which don't require sterilized jars or a final boiling-water-canning or pressure-canning step. How easy is that?!

Not only is freezing easier and safer, but some studies suggest that the process of freezing produce destroys fewer vitamins and minerals than traditional hot-canning methods.

I've had limited experience freezing produce, so I'm hoping that it really does turn out to be a good alternative to canning. I'm certainly putting our half-sized, newly acquired upright freezer* (craigslist, how I love thee!) to good use! If the four pounds of pears frozen in syrup- my first experiment beyond freezing pesto- turn out well, I think a celebratory winter pear clafoutis will be in order.

* An extra special thank you L, S and A for retrieving it and carrying it up all those stairs!

Tuesday, September 4, 2007

Trip to Maine


On Wednesday of last week, A and I's family called to see if they wanted to come up that weekend (to their farm in Maine) for the yearly lamb slaughter and Mexican lamb feast.

We were invited along and were thrilled to go- it's always a treat to visit! It's hard not to take a million pictures, and I'm not sure if I can narrow it down to a manageable amount... but who wants just a few pictures, anyway?

When we arrived, we parked across the road at the little house (now used as a guest house). The first things you see there are the ornamental crabapple trees that flank the little house:


To get to the main house, you walk past the orchards:


and the vegetable garden:


and the flower hedge bordering the vegetable garden:


If you can pull yourself away from the beautiful flowers:


and the stunning view:


you will be greeted at the main house...


by three of the sweetest mastiffs you will ever meet!


If you can catch them, you will also find at least a handful of darling kittens:


C has a reputation for being able to find loads of wild mushrooms, and there are usually baskets of them all around the kitchen.


When the lamb roasting was done, everyone feasted; as usual, the food was incredible, and everyone happily ate way too much. I was too busy eating to catch pictures of the platters of roasted lamb, stew, chowder, chimichangas, enchiladas, homemade tortillas, salads, and bowls of refreshing, fiery salsas and sauces. A made quarts of his fabulous mojitos, and there was enough beer to satisfy an army!


When we felt like we could move again, and sunset was starting to creep in...


L, A, L, I, A, (what a funny set of initials!) and I took a walk past the beehives:


to the vegetable garden, where C and W gave all of us loads of gorgeous vegetables to take home!


Then, we moved on to the orchards, where we harvested tiny kiwis (you eat them whole!):


pears:


damson plums and sweet crabapples, to add to our already overflowing boxes of produce.


When we couldn't carry any more, the mosquitos were driving us mad, and night was fast approaching, we went back to the house to try a beautiful spread of delicious desserts.

I can't think of a better way to spend a Saturday!

Saturday, September 1, 2007

Breville Two-Speed Juice Fountain + Watermelon Juice


Ours is a juice-lovin' household. L talked about getting a juicer ever since our daily trips to the juice bars that dot the streets of Cairo, and I've always liked the idea of being able to make juice at home.

When L's birthday rolled around this year, I knew just what to get him. After doing a bit of research, I settled on the very well-reviewed Breville Two-Speed Juice Fountain (I'm not quite sure why they had to call it a juice "fountain"). We've tried lots of different combinations with great results, and I'm blown away by the amount of juice that this powerful machine can squeeze out of whatever we throw at it. Added bonus: most of the parts are dishwasher safe!

Not only do we get more fruits and vegetables into our diet (I sound like a doctor and a salesman, I know), but the juicer is a fabulous vehicle for using up desperately-need-to-be-eaten fruits and vegetables, too. We do our best, but I inevitably discover a few carrots or one lonely peach at the back of the refrigerator crisper. I hate throwing out food, so I'm happy that I have a way to use up whatever juice-friendly* produce we might have on hand.


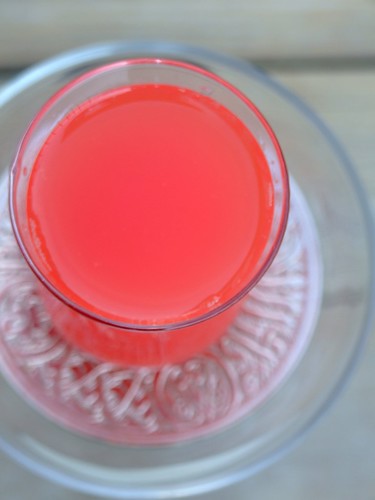
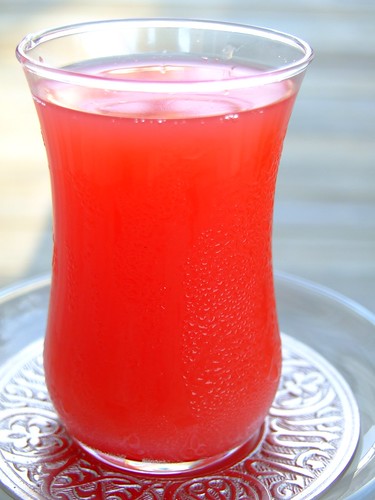
A few weeks ago, we bought a huge watermelon. I insisted, as I sometimes misguidedly do, that I was going to eat the whole thing before it went bad. After I'd gotten about 1/4 of the way through, I had to admit defeat. There was no way I was going to finish it on my own. Of course, there was only one thing to do! One weekend morning, I juiced one small lime with half of the watermelon flesh, seeds included, and it made enough to fill five lowball glasses with vibrant, coral-pink juice. A had spent the second half of the weekend with us, and the three of us agreed that the juice was fabulous.

If you're in the market for a juicer, I highly recommend Breville. If you already have a juicer, give watermelon juice a try. Next stop- watermelon cocktails!

* There are a few things, like spinach and garlic, that I just can't bring myself to juice. Blech.